Sunday, July 18, 2010

Bobby Flay's Pineapple Upside-Down Cake


For my first attempt at making and eating pineapple upside-down cake, this was fantastic!! My friend's birthday was last week and when I asked for a request, she said she had just watched Throw Down with Bobby Flay and he made this cake, so that's what she wanted.  I happened to find the exact recipe on foodnetwork.com, but adapted it to cook in the oven instead of on the bbq.  (We also left out the YUCK of maraschino cherries and chopped nuts).

Ingredients:
2 c. cake flour
2 t. baking powder
pinch salt
1/2 c. (1 stick) butter, sofened
1 1/2 c. white sugar
3 eggs, separated
1 c. milk
1 t. vanilla extract
1/2 stick butter
1 c. brown sugar
1 (20-oz) can pineapple, drained (I used rings)

Directions:
Place a 10" cast-iron skillet in the oven and preheat to 350 degrees.

Cake Batter: sift the cake flour, baking powder, and salt together; set aside.  With a mixer, cream together the butter, sugar, and egg yolks.  With the mixer on low speed, add the dry ngredients to creamed mixture, alternating with the milk.  Add vanilla.  In a separate mixing bowl, beat the egg whites until stiff peaks form and then fold them into the batter.  Set aside.

Place the 1/2 stick butter and brown sugar in the skillet and let it melt and begin to caramelize.  When lightly caramelized, place pineapples to cover on top in a decorative patter. Then pour the cake batter over, filling to within 1/2" of the top of the skillet.  Transfer the skillet to a large foil pan and cover with foil (be careful handling the skillet as the handle will also be very hot).  Pierce the foil in the corners to allow steam to escape during the cooking process.

Bake until golden brown and the cake spring back when lightly touched with your finger, about 45 minutes.  Remove from the grill and run a knife around the edge of the skillet to free the cake.  Whle cake is still hot, place a serving plate on top of the skillet and careflly turn the cake over.  I recommend serving cake warm!

Sunday, July 11, 2010

Dehydrator

This is just a quick "rave" post...

I LOVE having a dehydrator!  Unfortunately the one I have is old and doesn't belong to me, but it's a great tool to have in the world of semi-natural living!  Currently, it is filling the house with an herby aroma as we have had 2 batches of thyme and rosemary going for the last few hours.  I also like to use it to dry fruit to snack on and have attempted the dehydrating of nuts for flour and almond milk.  Whatever the use, it's a great tool to have...

To read more about dehydrators, check out Passionate Homemaking's latest post about the Excalibur Dehydrator!

Friday, July 9, 2010

Chai Cookies

We have been on 2 kicks lately... chai and lemons.  Ooh! Maybe I should make something chai-lemon... okay, can you tell it's late?  That will be for another post... look forward to LEMON posts in the near future and maybe the addition of a chai-lemon something.  I bet you can't wait.

Back to THIS recipe.

I made a batch of my homemade chai mix recently (adapted from this allrecipes contribution).  Needless to say, we've been drinking blended chai's every night of the 100 degree summer weather!  As I was sipping on my favorite drink after a hard day, I got the ambitious idea to put my drink into cookie dough.  THESE are the result!  I did use inspiration and guidance from allrecipes on this one as well... enjoy!

Ingredients:
1/2 c. unsalted butter, softened
1/2 c. chai tea mix
2/3 c. white sugar
1 egg
1 T. vanilla
1 3/4 c. all purpose flour
1 1/2 t. baking powder
1/2 t. salt

Directions:

Blend together butter, chai mix and sugar until light and fluffy.  Add in egg and vanilla and beat well.  Throw in the dry ingredients (if using a kitchenaid, if not sift together first), and mix well.  If you do not have a cookie dough scooper, I recommend popping it in the freezer for about 20 minutes so it will be easier to work with.  Otherwise, drop by spoonfuls onto an ungreased cookie sheet and bake at 375 degrees for 8-10 minutes.

Saturday, June 19, 2010

Cooking in the midst of Craziness

There's still 2 more days until summer officially begins (according to the calendar), but I already feel the busyness taking over.  It seems as though the last month or so has come and gone without so much as a blink of the eye.  There are friends to see, holidays to celebrate, trips to take, and tasks to do.  Yet still, even when life is crazy, it's mandatory that we still eat.

What we eat remains in question.  I always strive to make homemade meals, to leave eating-out for special occasions.  To be perfectly honest, since my last recipe post I can probably count on one hand the times I've actually cooked dinner (which is why there is a lack of recent posts!).  However, I have found that there are tricks and shortcuts to keep us eating healthy, homemade food as often as possible.  I hope that I continue to practice these things when our family grows and life gets even crazier than it is now.

Some tips for cooking during crazy seasons:

  • Slow cooker meals - I LOVE my slow cooker.  I got a 6.5 qt all--clad, ceramic insert slow cooker for Christmas from my parents.  My only complaint is that I don't use it enough!  However, for a family of 2, I've found that I can prep a meal before bed, put it all in the crockpot in the morning, and have it ready for dinner when we get home from work with leftovers for at least 2 more meals.  http://crockpot365.blogspot.com is a great resource for recipes, as is allrecipes.com
  • Freezer meals - back in the winter when life wasn't quite so busy and we were actually home on weekends, I spent some time making freezer meals such as lasagna, enchiladas, soup, and pizza dough.  Next year, I will make more, but they have been a lifesaver (as long as I thaw it the night before).
  • Mix & Match - I try to make a big batch of something on my non-busy day so that we can eat it for the majority of the remaining nights.  However, this can get boring.  So, I make a large batch of say, rice, and then make chicken for 2 nights, beans for 2 more until the rice is gone.
  • Eat with Others - Majority of our crazy life comes from trying to spend time with friends and family.  If we see people during a meal, it allows fun preparation and a combination of cooking AND craziness. Also, generally speaking, if we have people over, the favor normally gets returned and we can have dinner at their place another night of the month.  It's a good system.
  • Take a break - I have to let myself slack every once in a while.  That means eating cereal or popcorn for dinner occasionally, having people over for pizza with a coupon, or making it "fend-for-yourself" night.  This is vital to crazy-life cooking survival.

Wednesday, June 2, 2010

Grass-Fed, Pastured Meat

I've been looking into local sources of organic, grass-fed, pastured meat... for those of you who are interested and in the Corvallis area, this is what I've found so far, but have not yet investigated prices or purchasing:


At Abundant Life Farm, our goal is to provide a better tasting and healthier product for consumers who care about the food they eat and how it is raised—food from the abundance of life God provides—true food for life.
Our layers, broilers, and turkeys are moved daily to fresh pasture and are fed a high quality, custom feed locally mixed to our own recipe. Turkeys are available for Thanksgiving. Now available is pasture raised duckling. Fresh broilers are available during the summer; frozen broilers are available year round.  Brown eggsare available year round. All of our poultry is processed by hand in our state inspected poultry processing facility, so we can verify the safety and cleanliness of our product from start to finish. 
Our salad bar beef is moved daily to fresh pasture. Pastured lamb and pork are available periodically throughout the year. Having learned first hand from pasture pioneer Joel Salatin, we are adopting his model to the Pacific Northwest. All of our beef, lamb, and pork are available by the piece or by the side. 
Abundant Life Farm, Scott and Marilyn Jondle, 16055 Gilliam Road, Dallas OR 97338. (503) 623-6378. E-mail: ALFarm@q.com.

Afton Field Farm is located in Corvallis, Oregon and owned by Tyler and Alicia Jones. Tyler is a graduate of Joel Salatin’s Polyface Farm apprenticeship program and the farm is adapted to Salatin’s philosophy and multi-species rotational grazing methods. 

We offer pastured poultry, beef and lamb, and oak savanna pork. The animals spend the majority of their lives outside and are moved to fresh pasture daily or as needed. The beef and lamb are strictly grass fed. All other animals—layer chickens, broiler chickens, turkeys and hogs— forage a portion of their diet from the pasture and woods and are supplemented with custom grain mixes milled locally. The hogs are often finished on apples or acorns. We also keep bees and have honey available.

Afton Field Farm, Tyler and Alicia Jones, 3375 SW 53rd Street, Corvallis OR 97333. (541) 738-0127.
Website: http://www.aftonfieldfarm.com/.  
~~~~~~~~~~~~~~~~~~~~~~~~~~~~~~~~~~~~~~~~~~~~~~~~~~~~~~~

Bald Hill Farm is a family farm, owned and operated by the Martin and Heeter Families. Our philosophy is: Good for You, Good for the Animals, and Good for the Environment. We believe in raising quality, healthy meat for our community. Our animals graze on several hundred acres, free to roam and eat all that nature intended them to. We use no hormones, feed antibiotics or by-products. 
Bald Hill Farm Office & Store, 5700 SW Reservoir Avenue, Corvallis OR  97333. (541) 753-3500. E-mail: info@4BaldHillFarm.com. Website:http://www.4baldhillfarm.com/.

~~~~~~~~~~~~~~~~~~~~~~~~~~~~~~~~~~~~~~~~~~~~~~~~~~~~~~~~~~~

Lake View Farm is an all natural, family operated farm located in the beautiful Willamette Valley in Oregon since 1928. Over four generations, striving to improve with each, we currently find ourselves producing  REAL Milk, Old Fashioned Pasture Fed Chicken, Grass Fed Beef, Plump Holiday Turkeys, Farm Fresh Eggs, Tender Spring LambChevré and Fresh Lean, Milk Fed Pork.
God has shown us the advantages of wholesome food produced in a naturally seasonal, sustainable way. This has provided us with the opportunity to grow quality food on our family farm. We are committed to supplying the healthiest products possible by providing nourishing feed and quality care for our animals. To us, this means a clean, low stress environment, plenty of fresh air and sunshine and all the grass our animals can eat.
Lake View Farm, 29540 Crook Drive, Halsey OR  97348. (541) 369-2393.
E-mail: lvf.realfood@gmail.com

The website http://www.eatwild.com/ is super cool... I feel a new obssession coming on!

Sunday, May 30, 2010

Thin Mints

This is what happens when you make girl scout cookies at home and they're happily frozen:
This is what happens when you make girl scout cookies at home and forget to turn the mixer speed down:


Oh, heavenly happiness.  I adapted this recipe from 101Cookbooks... it's really quite simple, just a little time consuming so give it some patience and attention and they'll be great.  We enjoy them straight out of the freezer served with Mint Chocolate Chip ice cream!


Chocolate Wafers:
8 ounces butter, room temperature
1 cup powdered sugar
1 teaspoon vanilla extract
1 cup cocoa powder
3/4 teaspoon salt
1 1/2 cups whole wheat pastry flour (or all-purpose flour)
Chocolate Peppermint Coating:
1 pound good quality semi-sweet chocolate, chopped (We used 3 cups of semi-sweet chocolate chips)
peppermint extract, to taste (I think we ended up with 1/2 tsp)
Preheat your oven to 350. Racks in the middle zone.

Make the cookie dough: In a mixer cream the butter until it is light and fluffy. Add the powdered sugar and cream some more, scraping the sides of the bowl a couple times if necessary. Stir in the vanilla extract and then the salt and cocoa powder. Mix until the cocoa powder is integrated and the batter is smooth and creamy, sort of like a thick frosting. Add the whole wheat pastry flour and mix just until the batter is no longer dusty looking, it might still be a bit crumbly, and that's o.k. You don't want to over mix and end up with tough cookies.
Turn the dough out onto a counter, gather it into a ball, and kneed it just once or twice to bring it together into once nice, smooth mass. Place the ball of dough into a large plastic bag and flatten it into a disk roughly 3/4-inch thick. Place the dough in the freezer for 20 minutes to chill.

Rollout and bake: Remove the dough from the freezer and roll it out really thin, remember how thin Thin Mints are? That's how thin you need your dough, about 1/8-inch. You can either roll it out between two sheets of plastic, or dust your counter and rolling pin with a bit of flour and do it that way. Stamp out cookies using a 1 1/2-inch cutter (this time I used one with a fluted edge, I've done hearts and other shapes in the past). Place cookies on a parchment-lined baking sheet and bake for 10 minutes. Remove the cookies from the oven and allow them to cool completely on a baking rack if you've got one.

Make the peppermint coating:

While the cookies are in the oven you can get the coating ready. I use a makeshift double boiler to melt chocolate (a metal pan over a saucepan of gently simmering water), but I know many people who swear by melting chocolate in the microwave. Slowly melt the chocolate, stirring occasionally until it is glossy and smooth. Stir in the peppermint extract. If you think the chocolate needs a bit more peppermint kick, add more extract a drop or two at a time - but don't go overboard.

Finishing the cookies: You are going to coat the cookies one at a time and then gently set them on a parchment-lined baking sheet to set. Drop one cookie into the chocolate and (using a fork) carefully make sure it gets fully coated. Lift the cookie out of the chocolate with the fork and bang the fork on the side of the pan to drain any extra chocolate off the cookie. You are after a thin, even coating of chocolate. Place on the aforementioned prepared baking sheet, and repeat for the rest of the cookies. Place the cookies in the refrigerator or freezer to set. They will set at room temperature, it just takes much longer, and I prefer them straight out of the freezer anyways ;)

Saturday, May 22, 2010

Quinoa Salad

Picture of this is coming soon...

I recently discovered quinoa and have been trying to figure out what exactly I'm supposed to do with it... this recipe was amazing!  It goes perfectly at a potluck or with a barbecue.

Ingredients:
2 c. uncooked quinoa - cooked according to package instructions
1 bunch fresh asparagus, trimmed and cut into 2 inch pieces
8 oz. grape tomatoes, halved
6 oz. feta cheese
3 T. balsamic vinegar
2 T. olive oil
black pepper

Directions:
While quinoa is cooking, put asparagus in a steamer over 1 inch of boiling water.  Cook until tender but still firm, about 2-5 minutes.  Drain and immediately submerge in ice water and drain again.
Toss the asparagus, tomatoes, and feta with quinoa.  Add the olive oil and vinegar and season with pepper and toss to incorporate.

One night I stir-fried it to re-heat and threw in some diced ham as well.  It was delicious!

Apple-Banana Muffins

Yummy! I adapted this recipe from Passionate Homemaking.  We ate them for breakfast in the morning and then threw some frosting on to turn them into cupcakes for dessert that evening!

Ingredients:
*1/3 c. butter, melted and cooled
*1/3 c. applesauce
1 c. brown sugar
*2 eggs
1 tsp. vanilla
1/4 c. yogurt
2 c. whole wheat flour
1 tsp. baking soda
1/2 tsp. baking powder
1 tsp. salt
1/2 tsp. cinnamon
1/2 tsp. nutmeg
1 c. ripe bananas
2 apples, peeled, cored and grated

Directions:
Preheat oven to 375 degrees.  Mix together dry ingredients in small bowl.  In a large bowl, cream together butter, applesauce, and eggs.  Beat in vanilla and yogurt.  Add dry ingredients to wet and stir just until combined.  Fold in apples and bananas.  Fill greased/floured or lined muffin tins with batter and bake for 20-25 minutes or until a toothpick comes out clean.

Notes:
* You can use all butter or all applesauce if you want... Next time I will use 2/3 cup applesauce and omit the butter.
* I didn't use eggs... I used flaxseed binder and I highly recommend it!

Sunday, May 16, 2010

Black Bean Soup

I forgot to take a picture of this before it was gobbled up, but it's definitely worth a try!  It was passed on to me from a magazine and I adapted the recipe so I could make it in the slow cooker.  If you would like the original recipe just let me know!

Ingredients:

4 cans black beans, drained and rinsed
2 cans diced tomatoes
1 c. minced shallots
1 c. minced onion
2 t. ground cumin
4 t. chili powder
4 cloves garlic, minced
1/2-1 t. salt
1/4 t. pepper
3 c. beef broth
4 oz. Canadian bacon, diced (about 5 slices)
1 small butternut squash, peeled and diced
Cheddar cheese

Directions:
Set aside 2 cups of the black beans.  Puree the remaining beans and tomatoes in a food processor or blender until smooth.  Pour mixture into a 4.5-quart crock pot or larger.  Add in reserved beans, squash, onions, shallots, garlic, and broth, but don't stir.  Heat the canadian bacon in a skillet over medium-high heat until lightly browned, about 2 minutes.  Add to the crock pot and cook on low for about 8 hours.  Add in the spices, stirring and adding more broth if it is too thick.  Serve with shredded cheese, tortilla strips, and/or sour cream.

Sunday, May 9, 2010

Some New Favorite Things

This weekend we went to Seattle to spend some time with friends.  We didn't go to any hole-in-the-wall or fancy restaurants, but that's okay... instead, I left with a few more kitchen items to add to my arsenal!

1.  Cast-iron Skillet.
10 3/4", seasoned skillet made by Lodge Cookware for $19.95. I am very, VERY happy with this purchase from Sur La Table.  This store was incredible... I wanted to buy everything in it.  But we settled for this much-needed addition to my cookware.  Be looking for recipes that involve the use of my new baby!

2.  Soup Socks
The lovely Mrs. Wade introduced me to this concept.  I walked into her house Friday night welcomed by the homey aroma of chicken stock simmering.  Let's say I was more than enamored when I saw all the flavor makings in a neat little "sock" that can simply be picked up and thrown in the compost when the stock is done.  No more straining!  Also purchased from Sur La table, a pack of 3 for $2.95.


3. Silicone-Coated Whisk


Again, I had a heightened sense of envy when I saw this utensil in Mrs. Wade's kitchen!  Silicone-coated whisk from Crate & Barrel so that I can actually stir things are intended in my non-stick cookware without scratching the coating!  Thank you, Mrs. Wade for the someday-we'll-be-mother's day present. :)

4. Breakfast Bowl and Saucers
My favorite new kitchen, also courtesy of Mrs. Wade.  THANK YOU, THANK YOU, THANK YOU, Mish! Two of these over-sized mugs and saucers in the reddish color are very happy in my cupboard and will be even more cheery with breakfast food in them!  

Tuesday, May 4, 2010

Slack

This is an apology blog.  I promise to post new recipes by next Wednesday!  For now, go visit out some of my favorite links listed on the right-hand column...

Thursday, April 22, 2010

Heartwarming Chili

Mac's mama's recipe... We made this to go on the hot dogs at the Wade's housewarming party, but it's great in a bowl with cheddar cheese and cornbread with it, too!
Ingredients:

1 1/2 c. kidney beans (soaked overnight with pinto beans)
2 c. pinto beans
1 lg. onion, diced
1 lg. green pepper, diced
1 lb. ground beef
32 oz. ketchup (whole bottle)
(about 28 oz) lg. can whole peeled tomatoes
1 1/2 tsp. salt
1/8 tsp. paprika
1/8 tsp. cayenne pepper
3 whole cloves
1 bay leaf (or 2 little ones)
1-2 T. chili powder

Drain the beans that have been soaked overnight and recover with water. Boil beans for a few minutes, drain again, then soak again while you brown the meat. Add all the ingredients to the beans pot and simmer!

Hot Dog Central

The lovely Mrs. Wade and her hubby bought a house last month! We were able to go up and celebrate with them and help out with the housewarming party. So creatively simple, she had a hot dog dinner, creating stations for 4 major city hot dogs. I thought it was a great idea, even if hot dogs aren't very healthy. There were some great sides to go along with the hot dogs and when I get the recipes from her, I'll be sure to share!


Melted Swiss Cheese & Sauerkraut


Onions Stewed in Tomato Paste with Brown Mustard


Coleslaw


Chili, Cheese, and Onions


Quick & Rich Vanilla Frosting

See the Devil's Food Cake for a photo of this frosting. It's amazing. I will never make another cake-frosting recipe again. Period.

Ingredients:
2 T. heavy cream
1 tsp. vanilla extract
A pinch of salt
2 1/2 sticks unsalted butter, softened
2 1/2 c. powdered sugar

Direction:

Stir the cream, vanilla, and salt together in a small bowl until the salt dissolves. Beat the butter with an electric mixer on medium-high speed until smooth, 30-60 seconds. Reduce the speed to medium-low, slowly add the powdered sugar, and beat until smooth, 2-5 minutes. Beat in the cream mixture. Increase the speed to medium-high and beat until the mixture in light and fluffy, 4-8 minutes.

There's some sweet variations listed in the ATK cookbook, too. If you want the recipe for Dark Chocolate, Coffee, Peppermint, Orange, or Peanut Butter frosting, just comment and I'll add them!

Frosting a Cake...

This may seem silly, but it was really helpful for me to follow when frosting the birthday cake.

1. Dollop a small amount of the frosting in the center of a platter or cake stand to help anchor the bottom layer of the cake to the plate and prevent it from sliding.
2. Lay the first layer in the center of the platter and cover the exposed platter with strips of parchment paper to help keep it clean.
3. Gently brush away any large cake crumbs, then dollop about 1 cup of frosting in the center of the cake. Spread into an even layer right to the edge. A thin, offset metal spatula works really well but I used a butter knife since I didn't have one.
4. Lay the second layer on top, making sure the layers are aligned. Brush away any large crumbs, dollop another cup of frosting in the center, and spread out and slightly over the very edge.
5. Gather a few tablespoons of frosting onto the tip of the spatula, then gently smear it onto the side of the cake. Use gentle motions and don't press too hard or you'll get crumbs in the frosting. Clean off the spatula with paper towels as needed and repeat all the way around the cake. It's okay if this layer isn't smooth.
6. After you've frosted the sides, gently run the edge of the spatula around the sides to smooth out any bumps and the area where the frosting from the top and sides meet. Don't remove the paper strips until you are completely done decorating.

Devil's Food Cake


Mac shares a birthday with Tana from our house church, so we made a Devil's Food Cake to share with everyone. It was light, fluffy, moist, and absolutely decadent! Couple of things.. the recipe calls for 4 cups of frosting and 3 8" cake rounds. I only had 2 9" pans and used the regular size recipe of frosting... it worked great.

Ingredients:
1 1/2 c. all-purpose flour
1 tsp. baking soda
1/2 tsp. baking powder
1/4 tsp. salt
1 1/4 c. boiling water
4 oz. unsweetened chocolate, chopped
1/2 c. Dutch-processed cocoa powder
1 tsp. instant espresso/coffee
10 T. (1 1/4 sticks) unsalted butter, softened
1 1/2 c. packed light brown sugar
3 large eggs, at room temperature
1/2 c. sour cream (I used light sour cream)
1 tsp. vanilla extract

Directions:
Preheat the oven to 350 degrees. Lightly coat three 8" cake pans with vegetable oil and line the bottoms with parchment paper. Whisk the flour, baking soda, baking powder, and salt together in a large bowl and set aside. In a separate bowl, whisk the boiling water, chocolate, cocoa powder, and instant espresso together until smooth.
Beat the butter and sugar together in a large bowl with an electric mixer on medium speed until light and fluffy, 3-6 minutes. Beat in the eggs, one at a time, until incorporated, scraping down the bowl and beaters as needed. Beat in the sour cream and vanilla.
Reduce the speed to low and beat in 1/3 of the flour mixture. beat in 1/2 of the chocolate mixture. Repeat with 1/2 of the remaining flour mixture, then the remaining chocolate mixture, and finally the remaining flour mixture. Give the batter a final stir using a rubber spatula to make sure it is thoroughly combined. Divide the batter EVENLY among the prepared pans and smooth the tops. Bake until a wooden skewer inserted into the center of the cakes comes our with a few crumbs attached, 15-20 minutes, rotating and switching the pans halfway through baking.
Let the cakes cool in the pans on wire racks for 10 minutes (VERY important). Run a paring knife around the edge of the cakes to loosen, then flip out onto the racks. Peel off the parchment paper, flip the cakes upright and let cool completely before frosting, 1-2 hours. It's really, REALLY important to let the cake cool all the way. Seriously, walk away and watch a movie or something... you'll drive yourself crazy if you watch it cool.

Grama's Pie Crust

No pie crust is as a good as Grama Kay's... you can try and compare it with others, even Martha Stewart's and Test Kitchen's, and she still wins!

Ingredients:
2 c. sifted flour
1 t. salt
3/4 c. shortening
5-7 T. ice water

Directions:
Mix together flour and salt. Cut in half the shortening at a time. Add water and mix with a fork. Knead the dough until it sticks together. Part dough in half to make two shells. Roll out dough with flour. Put in pie plate and add filling.

For the French Silk Pie, you need to bake the crust first. Preheat the oven to 425 degrees. Line the pie crust with a double layer of foil and fill it with pie weights (I use pennies). Bake until light golden brown, about 25 minutes.

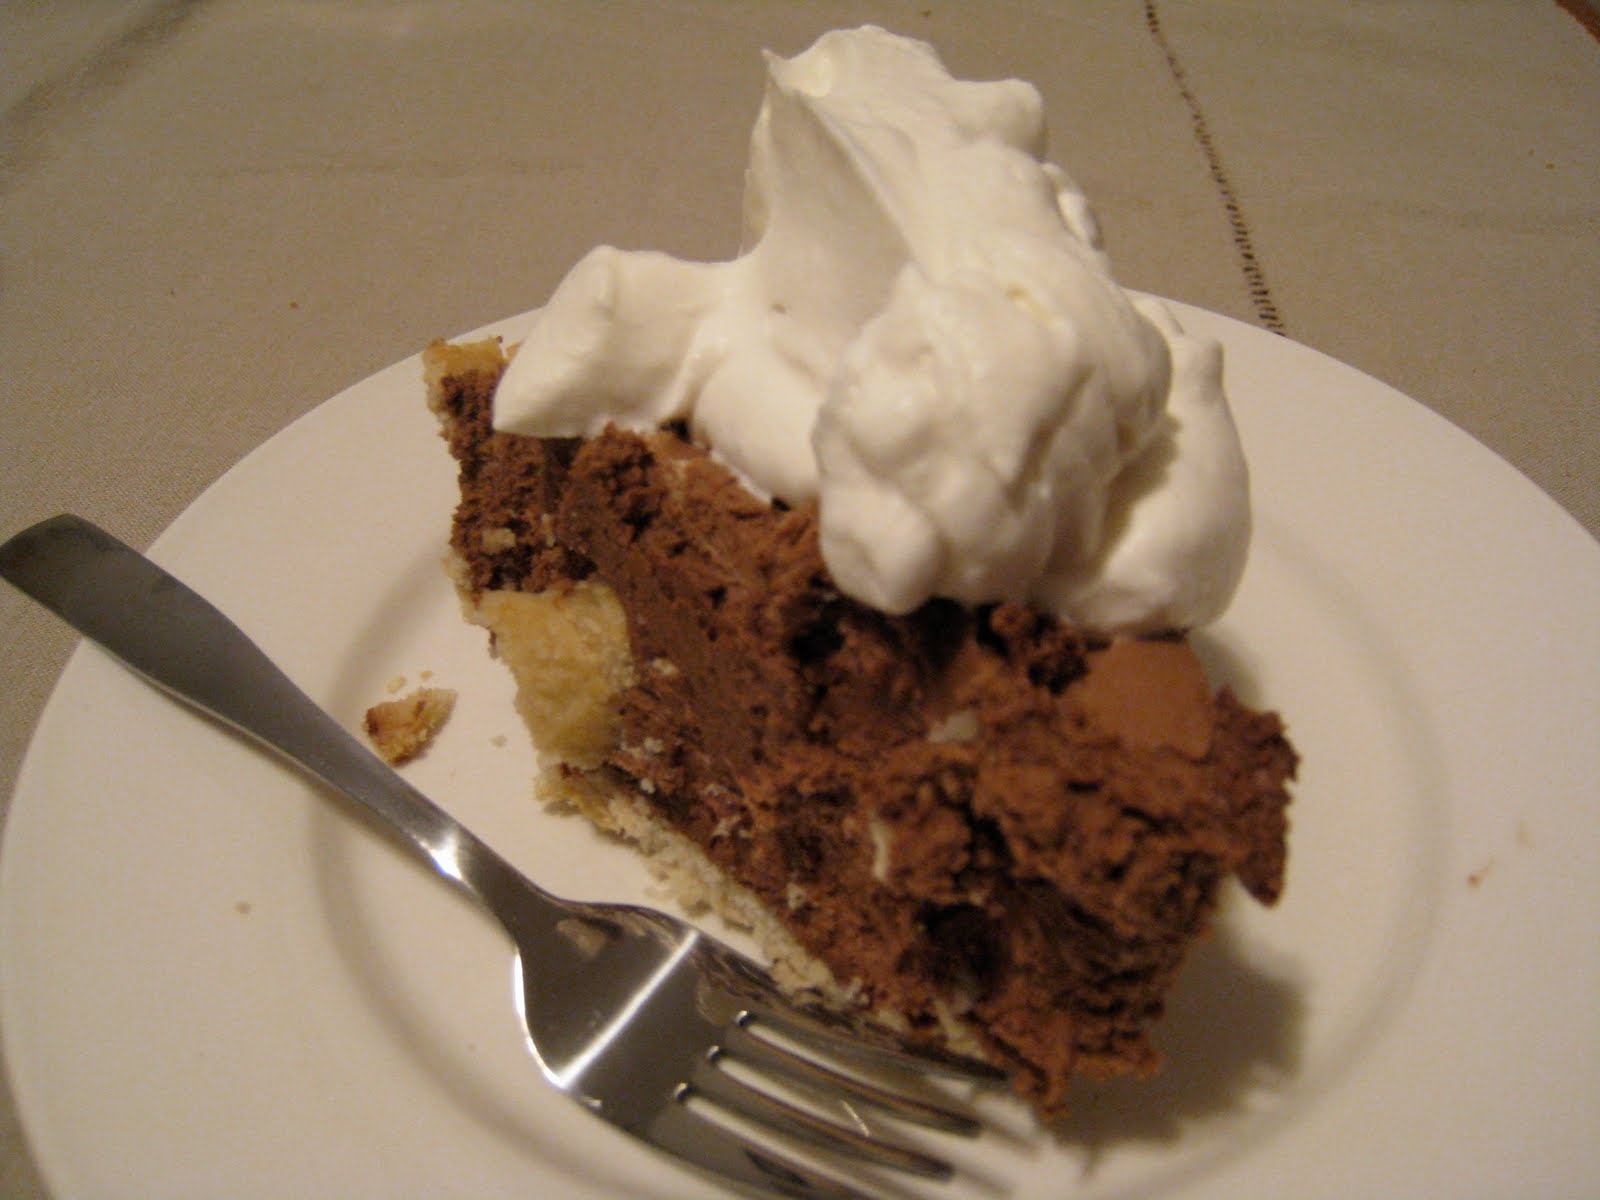
French Silk Pie


We went on a married-date to Border's to look at cookbooks last week and while flipping through one of the Test Kitchen publications, Mac came across a picture of this recipe. His jaw dropped open and he said, "I want THAT for my birthday!" Well of course we didn't buy the cookbook, so I went on a hunt to find this particular recipe... lucky for Mac, lucky for me, and lucky for you, I found it!

This recipe is pretty labor-intensive. You really need to pay attention to what you're doing (which I don't normally do; I'm a multi-tasker), and you need to be ready to spend some time nurturing it. Let me tell you though, it's worth all the time, effort, and calories in the end!

You will need a fully baked pie shell for this recipe... I'll give you Grama's untouchable crust recipe following this one. Serve with sweetened whipped cream.

Ingredients:
1 cup heavy cream , chilled
3 large eggs
3/4 cup sugar
2 tablespoons water
8 ounces bittersweet chocolate , melted and cooled
1 tablespoon vanilla extract
8 tablespoons (1 stick) unsalted butter , cut into 1/2-inch pieces and softened
1 (9-inch) pie shell , baked and cooled

Directions:
Whip cream with electric mixer on medium-high speed, whip cream to stiff peaks, 2 to 3 minutes. Transfer whipped cream to small bowl and refrigerate.
Combine eggs, sugar, and water in large heatproof bowl set over medium saucepan filled with ½ inch barely simmering water (don’t let bowl touch water). With electric mixer on medium speed, beat until egg mixture is thickened and registers 160 degrees, 7 to 10 minutes (it actually took us about 15 minutes to get to 160). (Beating the eggs and sugar together in a double boiler incorporates air and gives the filling a light texture).Remove bowl from heat and continue to beat egg mixture until fluffy and cooled to room temperature, about 8 minutes.
Add chocolate and vanilla to cool egg mixture and beat until incorporated. Beat in butter, a few pieces at a time, until well combined. Using spatula, fold in whipped cream until no streaks of white remain. Scrape filling into pie shell and refrigerate until set, at least 3 hours and up to 24 hours (I made it the night before his birthday).

Baking Overload!!

It's been a while since I've posted a new recipe, but let me tell you it's not due to lack of cooking! With Mac's birthday this week, I have a whole bunch of new recipes to add here, and then I'm going to take a short sabbatical from labor/time-intensive recipes. So get ready, here they come:

* French Silk Pie
* Grama's Pie Crust
* Devil's Food Cake
* Butter Cream Frosting
* Chili
* Cinnamon Rolls
* Pancakes
* Hot Dog Central

Tuesday, April 13, 2010

Southern Pecan Pie

House Church potluck this week was themed "Southern Cooking." I had no idea what to make, so I thought of the Zac Brown Band song "Chicken Fried" and decided to make Pecan Pie! It was my first attempt and my first time eating it... thought it was pretty delicious if I do say so myself! Oh, and like all my faves, this is from Test Kitchen. Next time I'm going to try the Maple Pecan Pie version to reduce the sugar and butter and eliminate the corn syrup

Ingredients:
1 pie crust (I'll try and get Grama's famous crust loaded, but no promises on when), unbaked

6 T. (3/4 stick) unsalted butter, cut into 6 pieces
1 c. packed dark brown sugar
1/2 tsp. salt
3 large eggs
3/4 c. light corn syrup
1 T. vanilla extract
2 c. pecans, toasted and chopped coarse

Directions:
Preheat the oven to 375 degrees. Line the crust with double layer of foil and fill with pie weights (or pennies). Bake until the pie dough looks dry and is light in color, 25-30 minutes. Transfer the pie plate to a wire rack and remove the weights and foil. Adjust the oven rack to the lower-middle position and reduce the oven temperature to 275 degrees. Keep the crust warm.
Melt the butter in a heatproof bowl set in a skillet of water maintained at just below a simmer. Remove the bowl from the skillet and stir in the sugar and salt until the butter is absorbed. Whisk in the eggs, then the corn syrup and vanilla until smooth. Return the bowl to the hot water and stir until the mixture is shiny, hot to the touch, and measures 130 degrees on an instant-read thermometer. Off the heat, stir in the pecans.
Pour the pecan mixture into the warm pie crust. Bake the pie until the filling looks set but yield like Jell-O when gently pressed with the back of a spoon, 50-60 minutes. Let the pie cool on a wire rack until the filling has firmed up, about 2 hours; serve warm or at room temp.

Hot Fudge Sauce

Mind if I just eat it by the spoonful? Yes, please! Sorry the picture is so bright; Lochmead Vanilla ice cream, while very edible, isn't very photogenic. Hot Fudge Sauce, a natural model and devourable (yes, I just made up a word)! This recipe is from a Crate & Barrel cookbook I got for Christmas from the lovely Mrs. Wade.

Ingredients:
2/3 c. heavy cream
3/4 c. light brown sugar (do NOT substitute dark brown)
1/4 c. superfine sugar
1/2 c. unsweetened cocoa, sifted (do NOT substitute chocolate bar)
3 T. unsalted butter, cubed
1 tsp. vanilla extract
a pinch of salt

Directions:
Put the cream, light brown sugar, superfine sugar ,and cocoa in a saucepan. Gradually bring to a boil, stirring occasionally. Turn down the heat and simmer gently for 1 minute, stirring continuously. Stir in the butter, vanilla extract and salt. Serve warm.

Spinach-Artichoke Pasta Bake


yum yuM yUM YUM!!! We had the Dorfner's over for dinner on Sunday, and this was our main dish... and it was amazing. It's the one of four leftover dishes that I'm actually excited about eating all week long. Next time, I will add chicken into the dish (we had it on the side).

Ingredients:
about 12 oz. whole-wheat pasta (short, sturdy)
1 - 14-oz. can artichoke hearts, drained and cut into quarters (I cut each quarter in half)
9 oz. frozen creamed spinach (I used 14 oz. Trader Joe's creamed spinach w/ asiago & parmesan cheese)
2 c. mozzarella cheese (8 oz.)
1/4 c. parmesan cheese
1/4 tsp. black pepper

Directions:
Cook pasta as directed on package. Drain and return to warm pot. Stir in artichokes, spinach, parmesan, 1/4 tsp. pepper and half of the mozzarella. Pour into a 2-quart baking dish and top with the remaining cheese. Bake at 375 degrees for about 10 minutes, then turn the oven to Broil and leave in the oven until cheese is brown and bubbly (about 2 minutes).

Sunday, April 11, 2010

German Apple Pancake


America's Test Kitchen recipe... I would recommend using Braeburn Apples, not Pink Lady (like we did). Nonetheless yummy! Also, when I say to "dust with powdered sugar, if desired", I mean DUST HEAVILY WITH POWDERED SUGAR, even if undesired. A large shower of powdered sugar is a must. Don't skimp.

Ingredients:
1/2 c. all-purpose flour
1 T. white sugar
1/2 t. salt
2/3 c. half-and-half
2 large eggs
1 tsp. vanilla extract
2 T. unsalted butter
3-4 large apples, peeled, cored, and cut into 1/2 inch slices
1/4 c. packed light brown sugar
1/2 tsp. cinnamon
1 tsp. fresh lemon juice
powdered sugar

Directions:
Preheat the oven to 500 degrees. Whisk the flour, sugar, and salt together in a large bowl. In a small bowl, whisk the half-and-half, eggs, and vanilla together. Whisk the half-and-half mixture into the flour mixture until smooth with no lumps.
Melt the butter in a 10-inch ovenproof skillet over medium-high heat. Add in apples, brown sugar, and cinnamon. Cook, stirring often, until the apples are golden brown, about 10 minutes. Remove from heat and stir in the lemon juice.
Quickly pour the batter around the edge of the skillet, then over the apples. Place the skillet in the oven and immediately reduce the oven temperature to 425 degrees. Bake until the pancakes i brown and has risen above the edges of the skillet, about 18 minutes.
Loosen the edges from the hot skillet with a spatula (don't forget to use an oven mitt to get the pan out!), and flip the pancake onto a large plate or serving platter. Dust with powdered sugar, if desired, (DO IT!), cut into wedges, and serve immediately.

Thursday, April 8, 2010

Creamed Potato Soup


We really enjoyed this soup, although it's fairly heavy... recipe from Passionate Homemaking Delicious served with homemade bread!

Ingredients:
5 medium russet potatoes
1 large onion, sliced
3 garlic cloves, minced
1 tsp sea salt
1/2 tsp white pepper
4 cups chicken broth
1/2 lb sliced bacon, cooked and crumbled (save bacon grease for sauteing)
1/2 cup milk
1/2 cup sour cream
1 cup grated cheddar cheese
4-5 kale leaves, chopped, more or less as desired

Directions:
Heat the oven to 375 degrees. Scrub the potatoes, pat dry, and pierce several times with a fork. Set them directly on the oven rack and bake until tender, about 1 hour. Let cool completely on a cooling rack. If you don't have an hour (like me, just microwave them... for 5 potatoes, I put them in for 18 minutes).
Combine reserved bacon grease, onion, garlic, salt, and pepper and cook, stirring occasionally, until softened.
Add the chicken broth to the onion mixture.
Cut the cooled potatoes in 1/2 inch cubes. Remove peel on one or two of that potatoes. Set aside one cup of diced potatoes. Throw the remaining potatoes into the pot with the onions.
Puree the contents of the pot in batches in a blender until very smooth. (remember that hot things expand in the blender, so don't fill it more than halfway). Return the soup to the pot and reheat over medium low.
Whisk together the milk and sour cream and then whisk this into the soup, along with the reserved 1 cup potatoes, cheese, and bacon. Add chopped kale and allow to simmer for 10 minutes or so. Season more with salt and pepper as desired.
Serve garnished with cheese, bacon bits, or green onions, as desired.

Chocolate-Dipped Peanut Butter Cookies


Inspiration for the chocolate-dip came from a co-worker who shares my love for chocolate and peanut butter combos. The cookie recipe is slightly changed from the wonderful Mrs. Wade. :)

Ingredients:
1/2 c. butter, softened
1/2 c. white sugar
1/2 c. brown sugar, packed
1 egg
1 tsp. vanilla extract
1 c. Adam's crunchy peanut butter
1 1/2 c. all-purpose flour
1/2 c. salt
1/2 c. baking soda
approximately 1 c. semi-sweet chocolate chips (i'm not really sure on this amount yet)

Directions:
Cream together butter and sugars. Beat in egg and vanilla extract, then add peanut butter and continue to beat until well-creamed. Add in flour, salt, and baking soda and mix well. Drop by tablespoonfuls on ungreased baking sheets, then press each cookie with a fork (twice to make the criss-cross pattern). Bake at 375 degrees for 12-15 minutes. Let cool completely on a wire rack.

When the cookies are cool, melt chocolate chips in the microwave. This is where you'll have to eyeball it... I used a little over 1/4 c. of chocolate chips and that 1/2 covered 6 cookies. For the whole batch, you'll probably need a cup of chocolate chips. I microwaved for 1 minute, stirring at 30 seconds and then at the end. Then, dip the cookie halfway in the chocolate and use a knife or spoon to spread evenly. Place on wax paper and let set. Then eat... with milk!

Monday, April 5, 2010

Scalloped Sweet Potatoes


These would have been perfect had I used all the exact ingredients, prepped the potatoes as instructed, and cooked the full time. Do as I say, not as I do, and follow the recipe from RealSimple!

Ingredients:
2 medium sweet potatoes (1 pound), peeled
2 medium russet potatoes (1 pound), peeled
2 cloves garlic, crushed
2 tsp. fresh thyme leaves
Salt and Pepper
2 1/2 c. heavy cream
Butter (for the foil)

Directions:

Heat oven to 400 degrees. In a food processor fitted with the thinnest (2 mm) slicing disk, slice the potatoes. In a shallow 1 1/2-quart baking dish, toss the potatoes, garlic, thyme, 3/4 tsp salt, and 1/4 tsp pepper. Add the cream and press gently to submerge the potatoes.
Cover the dish with buttered foil, place on a rimmed baking sheet, and bake for 20 minutes. Remove the foil and bake until the potatoes are tender and the top is golden brown, 25 to 30 minutes.

Saturday, April 3, 2010

Favorite Pancakes

Do you know what my favorite thing is? Enjoying a delicious recipe that is ridiculously healthy! Enter, new favorite pancakes.


Ingredients:
1 c. whole-wheat flour
1/2 c. rolled oats
1/4 c. wheat bran (you can also crush up some bran cereal - it works the same)
3 T. flax seed
3 T. brown sugar
1/4 t. salt
1/2 t. baking soda
1 t. baking powder
2 c. buttermilk
1 egg
1 t. vanilla extract
(and next time I'll consider 1-2 t. cinnamon)

Directions:
Mix together dry ingredients in a large bowl. Add the egg and vanilla to the buttermilk and beat until smooth. Make a well in the dry ingredients and pour in the milk mixture. Stir just until mixed, leaving some lumps. Cover and let sit for about 10 minutes (or you can put it in the fridge overnight and make it the next morning). Heat a skillet over medium heat (we used our electric griddle set at 400 degrees), grease with butter and then add 1/4 c. of batter for each pancake. Flip when bubbly, remove when golden brown. Serve with berries, applesauce, or grade B maple syrup.

Friday, April 2, 2010

Chocolate Chip Cheesecake Bars


Mac made these today for dessert with friends' and everyone loved them - even me, who doesn't like cheesecake! So yummy... not healthy, but next time I will adapt the recipe a bit to increase the health factor.

Ingredients:
3/4 c. shortening
3/4 c. sugar
1/3 c. packed brown sugar
1 egg
1 1/2 tsp. vanilla extract
1 1/2 c. all-purpose flour
1 tsp. salt
3/4 tsp. baking soda
1 1/2 c. miniature chocolate chips
3/4 c. chopped pecans

Filling:

2 pkgs (8 oz. each) cream cheese, softened
3/4 c. sugar
2 eggs
1 tsp. vanilla extract

Directions:

In a large mixing bowl, cream shortening and sugars until light and fluffy. Beat in egg and vanilla. Combine the flour, salt, and baking soda; gradually add to the creamed mixture until blended. Fold in the chocolate chips and pecans.
Set aside a third of the dough for topping. Press remaining dough into a greased 13x9" baking pan. Bake at 350 degrees for 8 minutes.
Meanwhile, in a small mixing bowl, beat cream cheese and sugar until smooth. Beat in eggs and vanilla. Spoon over crust.
Drop teaspoonfuls of reserved dough over filling. Bake at 350 degrees for 35-40 minutes or until golden brown. Cool on a wire rack. Cover and chill for at least 2 hours before serving.

Sunday, March 28, 2010

Buttermilk Biscuits

Test Kitchen Baking Book strikes again! I wasn't sure how to label this recipe... you can have it for breakfast, snack, dinner, and if you're like me, throw a little honey on and call it dessert. However you have it, just make sure you follow the directions... biscuits can be a little finicky.

Ingredients:
3 3/4 c. all-purpose flour
1/2 c. powdered buttermilk (you can substitute 1 1/4 c. buttermilk for milk and powdered buttermilk if you want, but it won't have as much flavor)
2 T. sugar
4 tsp. baking powder
1 1/2 tsp. salt
1 tsp. baking soda
3/4 c. unsalted butter, cut into 1/2 inch pieces and chilled
4 tablespoons vegetable shortening, chilled and cut into 1/2 inch pieces
1 1/4 c. whole milk

Directions:
Adjust an oven rack to the middle position and heat the oven to 450 degrees.

Pulse the flour, buttermilk powder, sugar, baking powder, salt, and baking soda together in a food processor to combine, about 3 pulses. Scatter the butter and shortening evenly over the top and continue to pulse until the mixture resembles coarse meal, about 15 pulses.

Transfer the flour mixture to a large bowl. Stir in the milk with a rubber spatula until the dough comes together. Turn the dough out onto a well-floured surface. Lightly flour your hands and the dough, and knead the dough gently until uniform, about 30 seconds. Roll the dough into a 10-inch round, about 1 inch thick.

Using a floured 2 1/2 inch biscuit cutter, stamp our 12 biscuits (don't twist the cutter or they'll be lopsided), gently patting the dough scraps back into a uniform, 1-inch-thick piece as needed. Arrange the biscuits upside down on the prepared baking sheet, spaced about 1 1/2 inches apart (you want to bake them upside down to ensure a more even rise).

Bake for 5 minutes. Rotate the pan, reduce the oven temperature to 400 degrees and continue to bake until golden brown, 12-15 minutes. Transfer to a wire rack, let cool for 5 minutes then serve warm.

Friday, March 26, 2010

White Chocolate Macadamia Nut Cookies


The perfect amount of sweetness and saltiness, these cookies (4 dozen, mind you), were gone in a matter of hours at our friends' house...

From allrecipes.com

Ingredients:
1 c. unsalted butter, softened
1 1/2 c. white sugar
2 tsp. vanilla extract
2 eggs
2 1/2 c. all-purpose flour
1 tsp. salt
1 tsp. baking soda
1 pkg. white chocolate chips (10-12 oz)
1 can macadamia nuts (7-9 oz)

Directions:
Cream together butter and sugar. Beat in the vanilla and eggs. Add the dry ingredients and stir until well-incorporated. Stir in the chips and nuts. Drop by spoonful on ungreased baking sheets and bake at 375 degrees for 8 minutes.

Thursday, March 25, 2010

Apple Dumplings

From the kitchen of Jan Evans

All this was lacking was vanilla ice cream... yum!

Ingredients:
2 c. sugar
2 c. water
1/4 tsp. cloves
1/4 tsp. cinnamon
1/2 c. butter
2 c. flour
3/4 c. shortening
1/2 c. milk
1 tsp. salt
2 tsp. baking powder
about 4 apples, grated
Cinnamon-sugar

Directions:

Mix the sugar, water, cloves, and cinnamon together in a pan and bring to a boil. Boil for 5 minutes. Remove from heat, add the 1/2 cup of butter, and let cool while preparing the rest of the dumplings. Sift together the flour, salt and baking powder. Cut in the shortening and then add the milk. Roll out dough to 1/4" thick rectangle. Cover generously with grated apples, sprinkle with cinnamon-sugar and roll up as for jelly roll and cut into 1" slices. Place in pan (so it looks like cinnamon rolls) and pour the syrup over all. Bake at 350 degrees for 30-40 minutes or until golden brown.

Tuesday, March 23, 2010

Herbed Whole-Wheat Pizza Dough


I make this in the bread machine, but you can also just mix all the ingredients together in a bowl, knead for about 5 minutes, then let it rise until doubled (about 1 1/2 hours).

For 2 lbs of dough, which makes 2 large pizzas:
1 1/3 c. warm water (80-90 degrees)
3 T. olive oil
1 c. bread flour + 2 c. whole wheat flour (I use 3 c. whole-wheat bread flour which you can get at WinCo in the bulk section)
1 T. italian herb seasoning
1 t. salt
1/2 t. garlic powder
1 1/4 t. active dry yeast

Directions:
But all ingredients in the bread machine in the order listed and set it on the dough cycle. When it's complete, separate the
dough into two pieces and shape into a ball. At this point, I wrap one in saran wrap and put in a freezer bag and store in the freezer for a later date. Take the piece you're using and cover with saran wrap and let rest for 10 minutes. Preheat the oven to about 375 if using a metal baking sheet and 450 if using a pizza stone (we prefer the pizza stone). Prep the toppings (our faves are red onions, green peppers, mushrooms, chicken, feta, and sun-dried tomatoes). You'll need about 3 cups of cheese. We use all mozzarella, but you can throw in a little variety if you'd like. My favorite sauce is pesto, but this time we used tomato because it was all we had. Use whatever you'd like.

Roll the pizza dough out flat, make a crust as thick as you want, then add your toppings. Tonight, Mac decided to put the chicken and veggies on before the cheese and it turned out great. Bake in the preheated oven for about 18 minutes.

Sunday, March 21, 2010

Granola Bars


Ingredients:
7 c. old-fashioned rolled oats
1/2 c. olive oil
1/2 t. salt
3/4 c. honey
3/4 c. light brown sugar
1 T. vanilla extract
2 t. ground cinnamon
1 1/2 c. whole almonds, pecans, peanuts or walnuts, chopped coarse (I used almonds and walnuts)
1 c. dried cranberries
1 c. flax seed

Directions:

Adjust oven rack to the middle position and heat the oven to 375 degrees. Toss the oats, oil, and salt together in a medium bowl. Spread the mixture out over a baking sheet and toast in the oven, stirring often, until pale golden, 20-25 minutes.
Meanwhile, line an 18 x 13" rimmed baking sheet with foil and grease the foil. Cook the honey and sugar together in a small saucepan over medium heat, stirring frequently, until the sugar is fully dissolved, about 5 minutes. Off the heat, stir in the vanilla and cinnamon.
Transfer the toasted oat mixture to a large bowl and reduce the oven temperature to 300 degrees. Toss the oat mixture, honey mixture, nuts, cranberries, and flax seed together in a large bowl until well combined. Spread the mixture out over the prepared pan and press into an even layer using a greased spatula. Bake the granola bars until golden, 35-40 minutes, rotating the pan halfway through baking.
Let the granola bars cool in the pan for 15 minutes, then cut into bars. Let the bars cool completely, then remove individual bars from the pan using a spatula. Will store in an air-tight container for up to 2 weeks.

I adapted this from the Test Kitchen Cookbook, yet again...

Stuffed French Toast

The Test Kitchen Cookbook strikes once again! This brunch is the type of amazing where you want to eat more than one serving, but if you do you'll feel sick, and the idea that you get to eat it again tomorrow is satisfying.

I'm always careful to follow exactly what the Test Kitchen says to do the first round, and then I modify to make it healthier/lighter the following times. You can do what you want.

Ingredients:
6 oz. cream cheese, softened (I used neufachtel cheese, which is just "light cream cheese")
1/4 c. white sugar
1/4 t. cinnamon
pinch ground nutmeg
8 slices high-quality white sandwich bread (no joke, that's what it says... we don't know what "high quality" white bread is, but we went with Oroweat Classic White - next time I'll just use our normal, homemade wheat)
4 Tbs. unsalted butter
1 c. whole milk (used 1%)
1 large egg
2 t. vanilla extract
1/4 t. salt
1/2 c. all-purpose flour (i'll use whole wheat next time)

Directions:
Mix the cream cheese, 2 Tablespoons of the sugar, cinnamon, and nutmeg together in a small bowl until smooth. Wrap tightly and refrigerate until chilled, about 20 minutes.
Meanwhile, adjust an oven rack to the middle position and heat the oven to 200 degrees. Arrange the bread on a wire rack set over a baking sheet and bake until slightly dry, about 15 minutes; set aside, leaving the oven on.
Spread the cream cheese mixture evenly over 4 pieces of the bread, leaving a 1/2-inch border at the edges. Lightly press the remaining slices of bread over the top to make 4 sturdy sandwiches.
Melt 2 tablespoons of the butter and whisk it together with the milk, egg, vanilla, salt, and remaining 2 tablespoons sugar in a medium bowl. Slowly whisk in the flour until smooth. Pour the batter into a large shallow dish.
Lay 2 sandwiches in the batter and soak both sides, about 1 minute per side. Meanwhile, melt 1 more tablespoon butter in a 12-inch nonstick skillet over medium heat until beginning to brown, swirling to coat the pan.
Remove the bread from the batter, allowing excess batter to drip back into the dish and lay in the hot skillet. Cook until golden brown on both sides,a bout 2 1/2 minutes per side (*Seriously set the timer and let it cook for 2 1/2 minutes; don't bother it. If you set it on medium heat and cook it for that time, it won't burn... patience, young grasshopper!). Transfer the French toast back to the wire rack and keep warm in the oven. Repeat with the remaining sandwiches, butter, and batter. Serve with Grade B maple syrup (or whatever you'd like).

Saturday, March 20, 2010

Big, Beautiful Muffins

If you happen to read my Words Page, you would have seen that I checked out The America's Test Kitchen Family Baking Book from the library yesterday. Then, I sat down to determine exactly which recipes I could manage to make in the 3-week checkout time. The conclusion: I need to buy the book.

This was the first recipe out of the book, and we couldn't agree on a flavor, so I made a half batch of lemon-berry for Mac and the other half mocha-chip for me! We both liked the berry ones best. Add whatever you'd like to the basic batter and they should turn out great! Also, please note that the picture makes them look overcooked, but it's the espresso powder and whole-wheat flour... I NEVER overcook my baked goods. :)

Ingredients:

3 c. flour (I used 2 c. whole wheat + 1 c. all-purpose)
1 c. white sugar
1 T. baking powder
1/2 tsp. baking soda
1/2 tsp. salt
1 1/2 c. plain yogurt (Can use homemade!)
2 large eggs
1 stick unsalted butter, melted and cooled

Directions:
1. Adjust an oven rack to the middle position and heat the oven to 375 degrees. Grease a 12-cup muffin tin.
2. Whisk together the flour, sugar, baking powder, baking soda, and salt in a large bowl. In a medium bowl, whisk the yogurt and eggs together until smooth. At this point, if you are making two different kinds of muffins, you need to split the dry mixture and yogurt mixture in half because there will be different things you add to the yogurt mixture. If you're making all one kind, continue on...
3. Gently fold the yogurt mixture into the flour mixture with a rubber spatula until just combined, then fold in the melted butter (don't forget to split the butter in half also)
4. Using a greased 1/3 c. measure, portion the batter into each muffin cup. Bake until golden brown and a toothpick inserted into the center of a muffin comes out with just a few crumbs, about 25 minutes, rotating the pan halfway through baking.
5. Let the muffins cool in the pan for 5 minutes, then flip out onto a wire rack and let cool for 10 minutes before serving (or devour immediately as we do).

For Lemon-Berry:
Add 1 teaspoon grated fresh lemon zest to the yogurt mixture (I eye-balled about 1/2 tsp since I split the batch in half). Toss 1 1/2 c. fresh or not-thawed frozen berries with 1 tablespoon flour, then gently fold into the batter (used 3/4 c. of berries and 1/2 tbsp. of flour). Tossing with flour keeps the berries from sinking to the bottom of the muffins.

For Mocha-Chip:
Add 3 tablespoons instant espresso (again, since only 1/2 batch, I used 1 1/2 tablespoons) to the yogurt mixture and fold 1 cup (I only used 1/2 c.) semisweet chocolate chips into the batter.

Friday, March 19, 2010

Chicken & Dumplings

Thank you, Passionate Homemaking, for the foundation of this recipe! We loved this soupy-style chicken and dumplings recipe. So wholesome and filling... Next time, I think I'll add a little more liquid and some corn.

Ingredients:
2 c. carrots, chopped (about 4)
1/2 onion, chopped
2 potatoes, chopped
2 celery stocks, chopped
1 green pepper, chopped
2 c. chicken broth
2-3 c. cubed cooked chicken
1 1/2 tsp garlic salt
1 1/2 tsp thyme
1 tsp basil
1 c. milk
Dumplings:
2 1/4 cups whole wheat flour
1 c. milk
5 Tbsp butter, melted
1 Tbsp baking powder
1/2 tsp dried parsley
1/2 tsp salt
1/4 tsp pepper

Directions:
Saute chopped vegetables in coconut oil and spices for approximately 5 minutes. Add water/broth and heat to a boil and then simmer for about 10 minutes. Add cooked chicken and milk in the last 5 minutes. Pour into a 13×9 baking dish. I top it off with a dash of each of the spices again (sage, thyme & garlic powder). Scoop dumplings by rounded tablespoon onto the top. Cook for about 18 minutes at 425 degrees.

Dumplings:
Whisk together the flour, baking powder, parsley, salt, and pepper. Stir in the milk and melted butter until combined.

Monday, March 15, 2010

Candied Sweet Potatoes


This is a very out of place post; I'll just fore-warn you there. Please note that the unconventional food photo of all my cousins DOES contain the finished dish. It's the one on the hright underneath Kelli's (in the pink) plate. I also made those rolls on the left under Kimo's (beardman) plate, which also contains a little serving of today's dish. Okay, enough with the rambling. Today, we're visiting sweet potatoes. Yup, those orange root things that we only eat around Thanksgiving. A lot of times, some aunt ruins the dish by putting marshmallows on top. Not this one. This sweet potato casserole is perfection. I could eat it every day. Really. Thank you America's Test Kitchen for creating this new craving.

Sweet Potato Ingredients:
8 Tbs. (1 stick) unsalted butter, cut into 1-inch chunks
5 lbs. sweet potatoes (7 medium), peeled and cut into 1-inch chunks
1 c. packed light brown sugar
1/2 c. water
1 1/2 tsp. salt
1/2 tsp. pepper

Topping Ingredients:
2 c. pecans (I used 1 c. walnuts because I ran out of pecans)
1/2 c. packed light brown sugar
1 egg white, lightly beaten
1/2 tsp. salt
pinch cayenne pepper
pinch cumin

Directions:
1. For the sweet potatoes: melt the butter in a large pot over medium-high heat. Add the sweet potatoes, brown sugar, water, salt, and pepper. Bring to a simmer, then cover and reduce the heat to medium-low. Cook, stirring often until the sweet potatoes are tender (a paring knife can be slipped into and out of the center with very little resistance), 45-60 minutes.
2. When the sweet potatoes are tender, remove the lid and bring the sauce to a rapid simmer over medium-high heat. Continue to simmer until the brown sugar mixture has reduced to a glaze, about 8 minutes.
3. For the topping: Meanwhile, mix together all the ingredients for the topping in a medium bowl.
4. Adjust an oven rack to the middle position and heat the oven to 450 degrees. Pour the potato mixture into a 9x13" baking dish. Spread the topping over the potatoes. Bake until the pecans are toasted and crisp, 10-15 minutes.

I made it the night before, doing everything except step 4, then baked the next day right before dinner.

Sunday, March 14, 2010

Crockpot Yogurt


There is a sense of great accomplishment in making your own staples, such as yogurt. Keep in mind that this will not have the same consistency as store-bought yogurt. It's a little more soupy. I'm not hardcore enough to eat it plain, so I use it in recipes that call for yogurt, in smoothies, and with things like granola or fruit.

Ingredients:
1/2 gallon whole milk
1/4 c. vanilla yogurt
1 pkg. unflavored gelatin (optional)
1/4 c. honey (optional)

Directions:
Pour milk into a 2 1/2 qt. crockpot and heat on low for 2 1/2 hours. After the time is up, unplug the crockpot and let milk sit for 3 hours. Once it's done sitting, take out 1-2 cups of the milk and add the yogurt and gelatin. Mix well, then whisk back into the crockpot. Wrap the entire crockpot in two bath towels and let "incubate" overnight for 12-15 hours. Stir in the honey and transfer yogurt to glass jars or other desired storage containers.