Sunday, March 12, 2017

Healthy Smash Cake


  • Ingredients
  • Cake:
  • 1/2 cup rolled oats, ground to flour consistency
  • 1/2 tsp baking soda
  • 1/4 heaping teaspoon baking powder
  • 1/4 heaping teaspoon cinnamon
  • Dash ground nutmeg
  • Dash ground cloves
  • 1/4 cup olive oil
  • 1/4 unsweetened applesauce
  • 1 large egg, lightly beaten
  • 1 carrot, coarsely grated carrot
  • 1/2 Granny Smith Apple, coarsely grated tart apples


Frosting:
1/2 c. Whole milk, plain Greek yogurt
4 oz. cream cheese
Dash pure vanilla extract

Directions:
For the cake: Preheat oven to 350 degrees. In a medium bowl, whisk together ground oats, baking soda, baking powder, cinnamon, nutmeg, and cloves.In a separate bowl, whisk together egg, oil, and applesauce. Add the wet ingredients to the dry ingredients and mix until combined. Stir in the apple and carrot. Pour batter into two small ramekins. Bake at 350 degrees for 20-25 minutes, or until a toothpick inserted in the middle comes out clean.

For the frosting: While the cake is cooling, cream together yogurt, cream cheese and vanilla until smooth. 

To assemble: Remove the cakes from the ramekins when cool. Turn one cake upside down place on wax/parchment paper. Spread some frosting on the top. Layer the remaining cake, right side up, on top of the frosting. Frost the outside of the cake and decorate as desired.

Commentary:
My sweet tiny turned one today! We wanted her to experience the joy of smashing a cake, but also wanted to avoid a sugar rush. Tiny also has some food allergies and has never had wheat before. In attempt to avoid an all-night party or a birthday trip to the ER, we decided to make a "cake" with no sugar and only ingredients she's had before. It was a hit! Packed with all the macronutrients her little body needs, I had no guilt letting her have it on her party day and the next morning for breakfast. It was the perfect size for her little hands and surprisingly full of flavor. I think will be making this again just for snacking!

Wednesday, February 15, 2017

Veggie Cookies

These cookies are a great way to get your little one to eat their veggies. They look questionable, but I promise they'll gobble them up!


Ingredients:

3 cups oat flour (rolled oats ground to flour consistency)
1 tsp. baking powder
1 tsp. baking soda
2 tsp. cinnamon
1 1/2 cups shredded veggies (I used one zucchini and one carrot)
1 apple, cored and shredded
1 cup baby spinach
1 cup steamed vegetables (I used broccoli and green beans)
1/2 cup whole milk plain greek yogurt
2 eggs

Directions:

Preheat the oven to 350 degrees. Line two baking sheets with parchment paper.

In a large bowl, mix together the oat flour, baking powder, baking soda, and cinnamon. Blend the spinach, steamed vegetables, and yogurt in a food processor or blender until smooth. Add the eggs to the veggie mixture and blend again until smooth.

Add the wet ingredients to the dry and mix until combined. Add in the shredded veggies and apple and stir until incorporated.

Drop by tablespoonful on the prepared baking sheets and flatten slightly. Bake for 10-12 minutes. I store these in the freezer and pull out enough for one day (my daughter eats 2 per day) each morning.

Monday, February 6, 2017

Chicken Bacon Spaghetti Squash

This was so good! You won't even miss the pasta and heavy sauce with this dinner! Adapted from a recipe found on Buzzfeed.

Photo by Lauren Zaser from BuzzFeed
INGREDIENTS
1 large spaghetti squash1 tablespoon olive oil
kosher salt and freshly ground pepper
6 slices bacon
1-2 lbs. boneless, skinless chicken thighs, cut into 1-inch pieces
1 tablespoon red wine vinegar
1 tablespoon maple syrup
1 5-ounce bag baby spinach
2 ounces soft goat cheese, crumbled (optional)
DIRECTIONS
1. Preheat the oven to 400°F.
2 . Cut about half an inch off of the top and bottom of the spaghetti squash, and discard. those pieces. Cut the squash crosswise into rings about 1-inch thick and remove the seeds. Drizzle the olive oil on the baking sheet, then spread the squash rings over it, moving them around a little so that the undersides are evenly coated with a little bit of oil. Season with salt and pepper, then flip the rings over and season again. 
3. Roast in the preheated oven until the squash is tender, about 30 minutes. Let it cool slightly before peeling away the skin. Use a fork to create strings of squash. Transfer to a large serving bowl.
4. While the squash is roasting, heat a large skillet over medium heat, then add the bacon slices and cook to desired doneness. Transfer to a paper towel lined plate and chop into 1-inch pieces when cool enough to handle.

5. Add the chicken to the bacon grease and cook until it is no longer pink. Add the red wine vinegar to the bacon fat in the pan while stirring and scraping the caramelized bits off the skillet. After about 20 seconds, turn the heat down to low and add the maple syrup. Stir together just to combine, then add the spinach, one handful at a time, stirring after every addition.
6. Add the bacon pieces and the chicken mixture to the bowl with the spaghetti squash and toss to combine.
7. Sprinkle the goat cheese over the mixture and toss until it melts slightly, or serve on the side as a topping for those that want a dairy-free option.

Friday, September 30, 2016

Gluten-Free Pumpkin Protein Muffins

Let's get right to the recipe! If you want to read the narrative, keep on scrolling. :)


Makes 12 muffins
Ingredients:
1 cup gluten-free rolled oats
1 serving gluten-free protein powder*, vanilla or pumpkin flavored (1 serving of my protein powder is 2 scoops)
1 tsp. gluten-free baking powder (Clabber Girl is a gluten-free brand)
1 tsp. baking soda
1/2 tsp. salt
1 tsp. pumpkin pie spice
1/4 c. pure maple syrup (you can use 1/2 c. brown sugar instead if desired)
1 c. pure pumpkin puree
2 eggs or 4 egg whites
1/3 c. unsweetened applesauce

Topping:
1 tbsp. gluten-free rolled oats
1 tsp. cinnamon

*If you are curious about what protein powder I recommend, shoot me a message!

Directions:
1. Preheat the oven to 350 degrees and adjust the rack to the middle position. Line a muffin tin with liners or spray with nonstick spray.

2. In a small bowl, toss the 1 tbsp. oats and cinnamon for the topping and set aside.

3. Blend the oats in a high-powered blender or food processor until fine. They should be about the consistency of flour. Add the protein powder, baking powder, baking soda, salt, and pumpkin pie spice and pulse a few times until well mixed.

4. In a separate bowl, whisk together the syrup/sugar, pumpkin puree, eggs, and applesauce. Add the dry ingredients and mix until completely incorporated.

5. Fill each muffin liner 3/4 of the way full. Sprinkle the oat topping evenly over all muffins.

6. Bake at 350 degrees for 20-25 minutes, or until a toothpick inserted in the middle comes out clean. Let cool for 5 minutes in the tin, then transfer to a wire rack. Enjoy!

And now I ramble...

Time is flying. I can't believe it has been an entire year since I last posted a recipe.  Granted, a lot has changed since the last pumpkin recipe - we added a new family member! Tiny is now 6 months old and keeping us plenty busy, hence the lapse of being a good blogger.

Fall is my absolute favorite season. It brings crisp air, painted trees, warm food, and, of course, pumpkin everything. It also seems to be a chance for new beginnings. With school starting back up, it's easy to argue that fall is more the start of a new year than January is. Fall is a great time to set new goals, make life changes, and have renewed energy. So, here I am, setting goals, making life changes, and having renewed energy to attempt to pick up blogging again.

Those of you who frequent this blog know that it's full of a wide spectrum of recipes:  healthy, gluttonous, dinners, desserts. I'm a creature who strives for balance and I truly believe we are meant to enjoy good food. In moderation, we should enjoy delicious treats, especially when they're made in our very own kitchens. The key is moderation. The majority of the time we should be enjoying healthy, wholesome, nutrient-dense food. Since I believe that God has given us such beautiful, natural nutrition that we're meant to enjoy, I'm going to spend the next several posts (at the rate I'm going, this might be the only one!) providing wholesome, healthy recipes. And since I also love baking and eating sweet treats, I'm going to attempt to create wholesome, healthy sweet treats. I would say I knocked that goal out of the park with these muffins! I was worried that the texture would be all wrong without all-purpose flour, but they are surprisingly fluffy and moist. They're packed with nutrients and low in fat and sugar. If you use pure maple syrup, they're guilt-free with only 84 calories, 2g fat, 7g sugar, and 4g of protein per muffin. They would be delicious with a smear of natural nut butter to make a nutrient-dense snack. Perfect fall treat!

Sunday, September 20, 2015

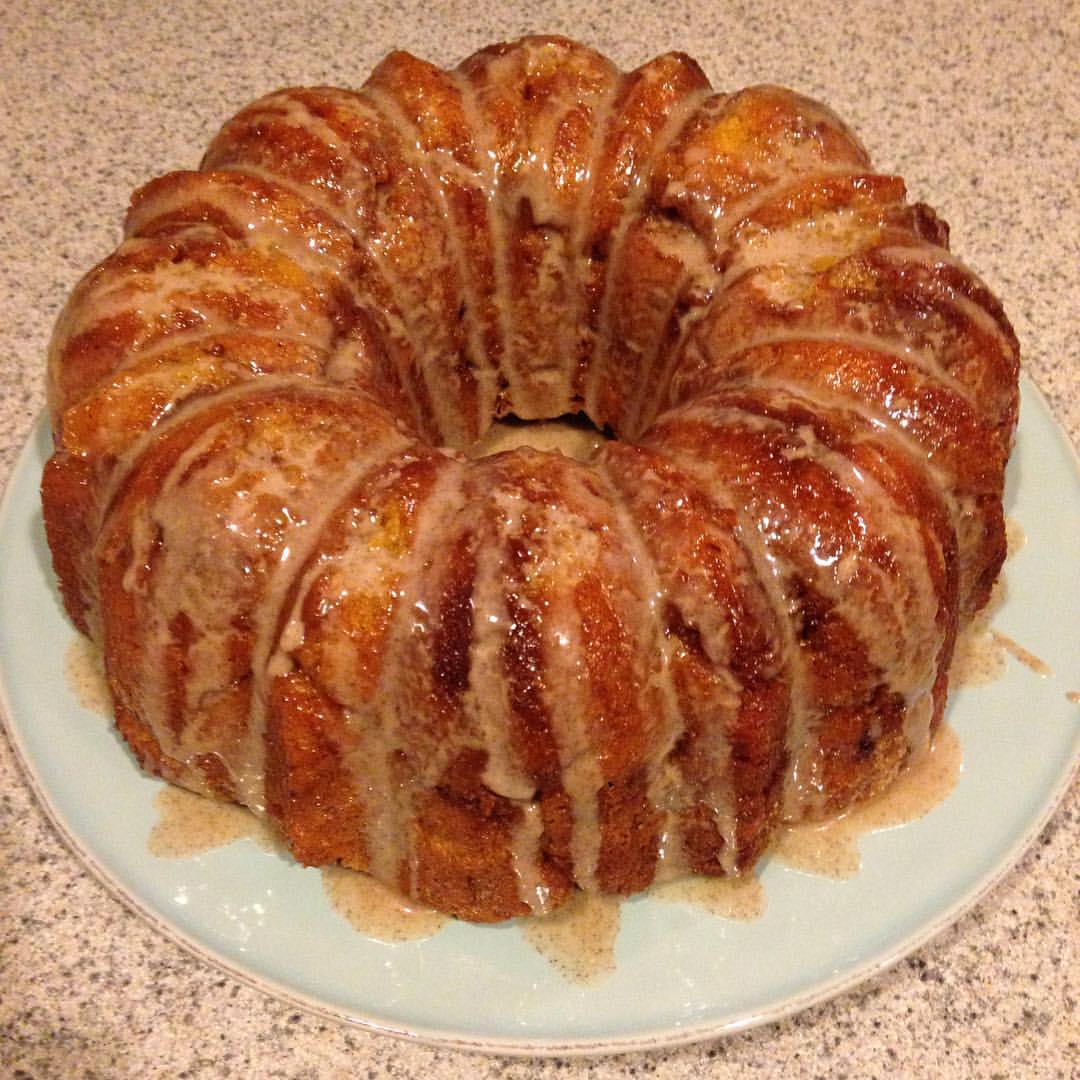
Pumpkin Monkey Bread with Cinnamon Glaze

It's finally fall, which means it's Pumpkin Everything season in the M&M Kitchen! The lovely Mrs. Wade and I were in the mood to bake something delicious that involved pumpkin and my new-to-me bundt pan. What evolved was this perfect treat - a combination of The Pioneer Woman's Pumpkin Cinnamon Rolls, creativity, and our own cinnamon glaze. It looks like a lot of work, but it's really easy. Most of the work is just waiting for it to finish so that you can devour it!

Ingredients

Dough (from Pioneer Woman):

1 1/2 c. whole milk
1/2 c. vegetable oil
1/2 c. white sugar
1 pkg (2 1/4 tsp.) active dry yeast
1 c. pumpkin puree
4 c. plus 1/2 c. all-purpose flour (keep 1/2 cup separate)
1/2 tsp. cinnamon
1/4 tsp. nutmeg
1/4 tsp. ginger
1/2 tsp. baking soda
1/2 tsp. baking powder
1/2 tsp. salt

Dough Coating:

1/2 c. butter, plus extra for greasing the pan
1 c. white sugar
1 tsp. cinnamon
1/2 tsp. nutmeg
1/2 tsp. ginger

Cinnamon Glaze:

1 c. powdered sugar
1 tsp. cinnamon
1 tsp. vanilla extract
2-4 Tbsp. whole milk

Directions

To make the dough, follow the directions as described by The Pioneer Woman:

In a large saucepan, combine the milk, vegetable oil, and sugar. Heat until hot, but not boiling, then remove the pan from the stove and allow it to cool until the mixture is still warm, but not too hot to touch. Sprinkle the yeast over the mixture and allow to sit for 5 minutes. Stir in the pumpkin puree until combined.

Meanwhile, combine 4 cups of flour with the with cinnamon, nutmeg, and ginger. Sprinkle it into the saucepan and stir until it just comes together. Cover with a dish towel and set in a warm, draft-free place for an hour, or until it has doubled in size. After it has risen, add the remaining 1/2 cup flour, baking soda, baking powder, and salt and stir until completely combined. Chill the dough in the refrigerator for at least 20 minutes so that it is easier to work with.

To assemble:

Grease a bundt pan (most bundt pans are about 10-cups) with butter. Melt the 1/2 cup of butter in a medium bowl. In a separate bowl, combine the coating ingredients of 1 cup sugar, 1 tsp. cinnamon, 1/2 tsp. nutmeg, and 1/2 tsp ginger.

Using your hands, form a piece of the dough into a 1" to 2" ball. Dip the ball in the melted butter, then immediately roll in the sugar mixture and place in the bundt pan. Repeat with the remaining dough until it is all used. Add more sugar and spices to the sugar bowl if needed. If there is any remaining butter, drizzle it over the dough in the bundt pan. Cover the pan with a dish towel and allow to rise for about 20 minutes while the oven preheats. Preheat the oven to 325 degrees. Bake for 40 minutes.

For the glaze:

Allow the bread to cool completely before removing from the pan and inverting onto a serving platter. Mix all the glaze ingredients together in a medium measuring cup or small mixing bowl. Drizzle the glaze over the bread and serve.


Wednesday, July 29, 2015

Indian Curry with Chicken and Easy Brown Rice

Last post, I mentioned that I would be on a monthly posting schedule until life got more settled. That was in April. Now, it is almost August, and I, as always, have failed to regularly share delicious recipes from our kitchen on the blog world. The truth of the matter is that our kitchen has not produced much more than salads and sandwiches for the last several months! We took on a big adventure of making a cross-country move, which involved selling all of our prized possession (including most of my stocked kitchen), packing what we could fit in our Toyota Avalon, and starting over in North Carolina. A big adventure might be an understatement... Let's call it a colossal life change. That's a story for another day (or days), maybe warranting its own blog. For now, let's get back to the theme of this blog - FOOD.

Food and adventure have gone hand-in-hand in our world. Most recent adventures include cooking with absolutely no equipment, slowly piece-mealing a kitchen back together, and taking on the challenge of cooking as many recipes as possible from the cookbooks that made the travel cut. Prepare yourself for several new recipes from America's Test Kitchen Family Cookbook, America's Test Kitchen Healthy Family Cookbook, and The Essential Best Foods Cookbook. To start, Indian Curry with Chicken and Easy Brown Rice from the Healthy ATK Cookbook!


This curry was a bit different than we were expecting, but it was absolutely delicious. It was definitely not as spicy as we like, but that can easily be fixed. Very easy to prepare, quick clean up, and makes enough for leftovers! You definitely want to make some rice to go with it, as it is much more soup-like than typical Indian curry. Also, don't skimp on the carbs... treat yourself to some naan - make your own or try Trader Joe's!

Indian Curry with Chicken - America's Test Kitchen Healthy Family Cookbook
Ingredients:
1 (14.5 oz) can whole peeled tomatoes
2 1/2 T. canola oil
4 1/2 tsp. curry powder
1 tsp. garam masala
1 onion, minced
1 jalapeno chile, stemmed, seeded, and minced (we added in the seeds for more heat)
3 garlic cloves, minced
1 T. grated fresh ginger
1 T. tomato paste
1 c. water
1 lb. boneless, skinless chicken breasts (2-3)
1/2 head cauliflower (about 1 lb.), cored and cut into 1-inch florets (about 3 cups)
1 c. frozen peas, thawed
1/2 c. plain whole milk yogurt
1/4 c. minced fresh cilantro
Salt

Directions:

Pulse the tomatoes with their juice in a food processor until no large chunks remain, about 5 pulses; set aside.

Heat the oil in a Dutch oven (or large pot) over medium heat until shimmering. Add the spices and cook for about 30 seconds. Add in the onion and cook for about 5 minutes. Add the jalapeno, garlic, ginger, and tomato paste and cook for 30 seconds more. Stir in the water and tomatoes, then add the chicken and cauliflower. Bring to a simmer for 12-18 minutes, or until the chicken is cooked through, flipping the chicken halfway through. Transfer the chicken to a carving board and shred into bite-sized pieces.

Put the shredded chicken and any accumulated juices back into the pot, then add the peas and simmer until heated through (about 2 minutes). Off the heat, stir in the yogurt and cilantro. Season with salt to taste and serve with Easy Baked Brown Rice and extra plain yogurt.

Easy Baked Brown Rice - America's Test Kitchen Healthy Family Cookbook

Ingredients:
1 T. olive oil
1 small onion, minced
Salt and pepper
2 1/4 c. water
1 c. low-sodium chicken broth
1 1/2 c. long-grain brown rice, rinsed and drained

Directions:

Preheat oven to 375 degrees. Heat the oil in a Dutch oven over medium heat until shimmering. Add the onion and 1/4 tsp salt and cook, stirring occasionally, until well browned, 12-14 minutes. (NOTE: I know this seems like a really long time to cook onions, but it really does make the dish very flavorful!)

Add the water and broth, cover, and bring to a boil. Off the heat, stir in the rice. Cover and bake until the rice is tender, 65 to 70 minutes.

Remove the pot from the oven, uncover, and fluff the rice with a fork, scraping up any rice that stuck to the bottom. Lay a clean folder kitchen towel underneath the lid. Let sit for 10 minutes. Season with salt and pepper to taste.


Saturday, April 18, 2015

Stovetop Pulled Pork on Homemade Buns

I'm on the monthly post schedule these days... We have several major transitions approaching, so blogging has definitely taken a back seat. I am hoping to get back into the normal groove that I attempted to revive once we get a few things settled. For now, enjoy April's monthly recipe:  Pulled Pork on Homemade Buns. 

I've tried my hand at several pulled pork recipes, majority of them involving my beloved slow cooker. This one takes a different approach, with a different cut of meat. Any guesses where the recipe is from? Of course, none other than America's Test Kitchen! I have had the recipe card from an old Cook's Country issue tucked away in my recipe binder for several years, and finally got around to trying it out.  The results: delicious! The meat has so much flavor and turns out plenty tender. I'm also sharing an added bonus of a homemade hamburger bun recipe, retrieved from the Taste of Home website. Enjoy!


Indoor Pulled Pork - from Cook's Country Magazine

Ingredients:
1 t. Chili powder
1 t. Paprika
1 t. Garlic powder
1/4 t. Salt
1/2 t. Pepper
2 pork tenderloins (about 2 lbs total), cut into 1" slices
1 T. Vegetable oil
1/2 c. Chicken broth
1/2 c. Barbecue sauce (Sweet Baby Ray's is our choice!)
3 T. Cider vinegar

Directions:
1. Combine spices in a small bowl. Pat the pork dry with paper towels and sprinkle spice mixture over it evenly.

2. Heat oil in a large skillet over medium-high heat until just smoking, Add pork and cook until well browned, 4 to 5 minutes per side. Transfer to a large bowl and tent with foil. Let it rest for 5 minutes before shredding into bite-sized pieces.

3. While the pork is resting, add broth barbecue sauce, and vinegar to the empty skillet, scraping up any browned bits. Simmer over medium-low heat until the sauce has thickened, about 3 minute. Stir in the shredded meat and cook until heated through, about 2 minutes. Season with additional salt and pepper as needed.

Serve with pickles or coleslaw!

Hamburger Buns - adapted from Taste of Home

Ingredients:
2 T. Active dry yeast
1 c. + 2 T. Warm water (110-115 degrees)
1/3 c. Vegetable oil
1/4 c. Sugar
1 egg
1 t. Salt
3 to 3 1/2 c. All-purpose flour

Directions:
1. In the bowl of a stand mixer fitted with a dough hook, dissolve yeast in warm water. Add oil and sugar and let sit for 5 minutes. With the mixer on low speed, Add the egg, salt, and 3 cups of flour.

2. Increase speed to medium-high and knead for 3 to 5 minutes, until dough is smooth and elastic. Add remaining flour, 1 tablespoon at a time, if the dough is very sticky.

3. Turn dough out on a lightly floured surface and shape into a smooth ball. Divide into 12 equal pieces and shape each piece into a ball. Place 3 inches apart on an ungreased baking sheet. Cover with plastic wrap or a clean towel and let sit at room temperature while the oven preheats, at least 10 minutes.

4. Preheat oven to 425. Remove plastic wrap/towel, and bake for 8-12 minutes, or until golden brown.

Sunday, March 15, 2015

Raspberry Charlotte


I had every intention of posting this recipe on Valentine's Day weekend, seeing as this is the perfect celebratory dessert. But, as is most common in my life, my days got away from me, and somehow in the blink of an eye, it became March! Then, I realized that I posted a "green" recipe on Valentine's Day (see HULK muffins). Apparently, I just wanted to mix up the holidays! So, in hindsight of Febrruary and preparation of St. Patty's day, I give you America's Test Kitchen's Raspberry Charlotte.

Let me tell you, this dessert is hard work. It takes a lot of time and concentration. It's full of everything you shouldn't eat. I don't even want to attempt to calculate the calories in it. You'll have to wash a lot of dishes. There will be waiting. Lots of waiting. But, I promise, it's all worth it for the final product! If you're feeling ambitious, give it a shot! 


Ingredients:

Fillling:
1 1/4 tsp. unflavored gelatin
2 T water
3 large egg yolks (reserve whites for cake)
2 tsp. cornstarch
1 pound (3 1/4 cups) fresh or thawed frozen raspberries
2/3 cup sugar
2 T unsalted butter
Pinch salt
1 3/4 cups heavy cream

Jam Mixture:
1/2 tsp. unflavored gelatin
1 T lemon juice
1/2 c. seedless raspberry jam (I couldn't find seedless, so I just strained mine through a fine mesh strainer after heating)

Cake:
2/3 c. cake flour
6 T sugar
3/4 tsp. baking powder
1/8 tsp. salt
1 large egg, plus 3 large egg whites (reserved from filling)
1/4 cup vegetable oil
2 T water
1 tsp. vanilla extract
1/4 tsp. cream of tartar

Directions:

1. The good stuff - make the filling: Sprinkle the gelatin over water in large bowl and set aside. Whisk egg yolks and cornstarch together in a medium bowl until combined. Combine raspberries, sugar, butter, and salt in medium saucepan. Mash lightly with whisk and stir until no dry sugar remains. Cook over medium heat, whisking frequently, until mixture is simmering and raspberries are almost completely broken down, 4 to 6 minutes.

2. Remove raspberry mixture from heat and, whisking constantly, slowly add 1/2 cup raspberry mixture to yolk mixture to temper. Whisking constantly, return tempered yolk mixture to mixture in saucepan. Return saucepan to medium heat and cook, whisking constantly, until mixture thickens and bubbles, about 1 minute. Pour through fine-mesh strainer set over gelatin mixture and press on solids with a rubber spatula or the back of a ladle until only seeds remain. Discard seeds and stir raspberry mixture until gelatin is dissolved. Set aside, stirring occasionally, until curd is slightly thickened and reaches room temperature, at least 30 minutes or up to an hour and 15 minutes.

3. Jam time: Sprinkle gelatin over lemon juice in small bowl and let sit until gelatin softens, about 5 minutes. Heat jam in microwave, whisking occasionally, until hot and lfuid, 30 to 60 seconds. Addd softened gelatin to jam and whisk until dissolved. Set aside.

4. Cakety cake cake: Adjust oven rack to upper-middle position and heat oven to 350 degrees. Lightly grease 8-inch round cake pan and 8-inch square baking pan, line with parchment paper, and lightly grease parchment. Whisk flour, sugar, baking powder, and salt together in medium bowl. Whisk oil, whole egg, water, and vanilla into flour mixture until smooth batter forms.

5. Using stand mixer fitted with whisk, whip egg whites and cream of tartar on medium-low speed until foamy, about 1 minute. Increase speed to medium-high and whip until soft peaks form, 2 to 3 minutes. Transfer one-third of egg whites to batter; whisk gently until mixture is lightened. Using rubber spatula, gently fold reamining egg whites into batter.

6. Pour 1 cup batter into round pan and spreadh evenly. Pour remaining batter into square pan and spread evenly. Place pans on rimmed baking sheet and bake until cakes spring back when pressed lightly in center and surface is no longer sticky, 8 to 11 minutes (round cake will be done first since it's shallower). Cakes should not brown. 

7. Let cakes cool in pans on wire rack for 5 minutes. Invert round cake onto wire rack. Carefully remove parchment, then reinvert onto second wire rack. Repeat with square cake. Let cool completely, at least 15 minutes. 

8. Place round cake in center of serving platter. Spread with 2 tablespoons jam mixture. Place ring from 9-inch springform pan around cake, leaving equal space on all sides. Leave clasp of ring slightly loose. Using sharp chef's knife, trim 1/8 inch off all tablespoons jam mixture. Cut cake in half. Cut each half lengthwise into two pieces to make four equal-size long strips. Place cake strips vertically around round cake, jam side in, taking care to nestle ends together neatly. Fasten clasp of springform ring.

9.Using stand mixer fitted with whisk, whip cream on medium-low pseed until foamy, about 1 minute. Increase speed to high and whip until soft peaks form, 1 to 2 minutes. Transfer one-third of whipped cream to curd; whisk gently until mixture is lightened. Using rubber spatula, gently fold in remaining cream until mixture is homogenous.

10. Pour filling into cake ring and spread evenly to edge (surface of fillign will be above edge of cake). Drizzle reamining jam mixture over surface of filling. Using knife, swirl jam through surface of filling, making marbled pattern. Refrigerate for at least 5 hours or up to 24 hours.

11. To unmold, run thin knife around edge of ring (just 1/2 inch down). Release ring and lift to remove. Let stand at room temperature for 20 minutes before slicing and serving.

Saturday, February 14, 2015

"Hulk" Muffins

We spend a significant amount of our free time around our friends' toddlers, and there is always a common theme: picky eaters. Mamas out there, just know you are not alone... every child goes through a phase in which every healthy option is met with "I don't like that!" 

So, I set out on a quest to make our godson eat his vegetables. Yes, I know, I'm mean. I tried to force feed him carrots the other day, and he wasn't even enticed with ranch. That's when I knew  I needed to up the ante. I knew if I could hide the veggies in a baked good, he would down them, as long as it tasted nothing like a vegetable. And that brings us to "hulk" muffins. They're seriously magic. I felt like a champion when I watched him down a mini-muffin in one bite and promptly ask for another one. Victory!

I adapted this recipe from superhealthykids.com, by adding a protein booster (chia seeds), eliminating the white sugar, and adding some more veggies. I'm sure you could use a variety of whatever veggies you have on hand, you just need a total of 2 1/2 cups of produce puree. Also, you can change the name of these muffins to whatever will entice your kiddo - the Hulk or all things scary/monstrous are what works for little man!


Ingredients:
  • 1 c. whole wheat flour
  • 1 c. all-purpose flour
  • 1 tsp baking soda
  • 1/2 tsp salt
  • 1/4 tsp nutmeg
  • 1/4 tsp cinnamon
  • 1/2 c. honey
  • 4 tbsp unsalted butter
  • 2 large eggs
  • 1 tsp vanilla extract
  • 1/4 c. unsweetened applesauce
  • 1 Tbsp. chia seeds
  • 1 medium carrot
  • 1 ripe banana
  • 1 small apple, cored
  • 1 c. baby spinach
  • 1/2 c. steamed broccoli
  • 1/2  c. steamed green beans
  • 1/4 c. plain yogurt
  1. Preheat oven to 375 degrees F.
  2. Mix together dry ingredients in a bowl. Set aside.
  3. Beat together the honey, butter, eggs and vanilla in a large bowl.
  4. Combine the applesauce, carrot, apple and spinach in a powerful blender (I use my Blendtec) or a food processor. Blend until smooth. 
  5. Add the steamd vegetables and banana to the puree and pulse until smooth.
  6. Combine the puree and yogurt into the butter mixture and beat until mixed.
  7. Finally, add the dry ingredients and mix just until combined and wet.
  8. Scoop the mixture into a prepared muffin pan
  9. Bake them in a 375 degree oven for about 20 minutes for regular size muffins, and 350 for 20 minutes for mini-muffins. Bake until the tops are slightly brown and a toothpick comes out clean or they bounce back when you touch them with your finger.

These freeze great! Put them in a freezer-safe bag and freeze for up to 3 months.

Friday, February 6, 2015

Tuscan Beef Stew with Polenta

I haven't been to Italy yet, but I imagine this dish from America's Test Kitchen brings me as close to the tastes and scents as I will get. Usually, I love stews that are chock full of vegetables, so I was a little leary of this being just beef. I was pleasantly surprised by the final product! The flavor pairings and the aroma filling your house as it simmers are incredible. Enjoy!


Tuscan Beef Stew
From Cooks Illustrated Magazine: January & February 2015 issue

Ingredients:

4 lbs. boneless beef short ribs (or a 5 lb chuck roast), trimmed and cut into 2-inch pieces
1 T. vegetable oil
1 (750-ml) bottle Chianti
1 cup water
4 shallots, peeled and halved lengthwise
2 carrots, peeled and halved lengthwise
1 garlic head, cloves separated, unpeeled, and crushed
4 sprigs fresh rosemary
2 bay leaves
1 T. cracked black peppercorns, plus extra for serving
1 T. unflavored gelatin
1 T. tomato paste
1 tsp. anchovy paste (I left this out and I think it turned out just fine!)
2 tsp. ground black pepper
2 tsp. cornstarch

Directions:

Toss beef and 1 1/2 tsp. salt together in a bowl and let stand at room temperature for 30 minutes. Adjust oven rack to lower-middle position and heat oven to 300 degrees.

Hear oil in a large Dutch oven over medium-high heat until just smoking. Add half of the beef in a single layer and cook until well browned on all sides, about 8 minutes total, reducing heat if fond begins to burn. Stir in 2 cups wine, water, shallots, carrots, garlic, rosemary, bay leaves, cracked peppercorns, gelatin, tomato paste, anchovy paste, and remaining beef. Bring to simmer and cover tightly with sheet of heavy-duty aluminum foil, then lid. Transfer to oven and cook until beef is tender, 2 to 2 1/4 hours, stirring halfway through cooking time.

Using slotted spoon, transfer beef to bowl; cover tightly with foil and set aside. Strain sauce through fine-mesh strainer into fat separator. Wipe out pot with paper towels. Let liquid settle for 5 minutes, then return defatted liquid to pot.

Add 1 cup wine and ground black pepper and bring mixture to boil over medium-high heat. Simmer briskly, stirring occasionally, until sauce is thickened to consistency of heavy cream, 12 to 15 minutes.

Combine remaining wine and cornstarch in small bowl. reduce heat to medium-low, return beef to pot, and stir in cornstarch-wine mixture. Cover and simmer until just heated through, 5 to 8 minutes. Season with salt to taste. Serve with polenta or crusty bread.

Creamy Polenta
From America's Test Kitchen Healthy Family Cookbook

Ingredients:
4 c. water
Salt and Pepper
1 c. coarse-ground polenta
1 1/2 T. unsalted butter, cut into pieces
1/2 c. grated Parmesan cheese

Directions:

Bring the water and 1/2 tsp salt to a boil in a large heavy-bottomed saucepan. Following the photo, slowly add the polenta while stirring constantly in a circular motion to prevent clumping. Bring to a simmer, stirring constantly.

Cover and reduce the heat to low. Cook, stirring often and vigorously (make sure to scrape the corners of the pot), until the polenta becomes soft and smooth, 10 to 20 minutes.

Stir in the butter and 6 tablespoons of the Parmesan. Season with salt and pepper to taste. Sprinkle with the remaining 2 tablespoons Parmesan before serving. 

Tuesday, February 3, 2015

Easy Superbowl Feast {Chips & Dip, Chili & Cornbread}

12th Man Sugar Cookies
Even though Mac's Seahawks lost in the final minute, we had a blast watching the Superbowl this year! I absolutely love having friends in our home, especially when it involves 4 toddlers scooting/crawling/running around. I love any opportunity I can get to make good food, eat it, and share it with others. We used simple recipes that can be prepped ahead of time to compile a homemade spread of deliciousness. I stuck with my favorite go-to's to ensure the least amount of stress. We had guests bring their own beverages to chip in. All the recipes can be found right here on the blog, minus the cornbread (which I'll share here).

The Menu:
The Game Plan:
  • Sometime the week before (or up to a month before): make the sugar cookies and freeze.
  • The day before:
    • Make the Spinach Artichoke dip up to the last step. 
    • Cornbread!
    • Assemble the chili.
    • Bake the brownies. Lick the bowl.
    • Wash the dishes as you go - you'll thank yourself later!
  • Game day:
    • Pull the cookies out of the freezer in the morning, and they're good as new!
    • Have your significant other make the 7-layer dip - save him/her some time and dishes by buying shredded cheese and sliced olives. 
    • Allow the spinach artichoke dip to sit at room temperature for about 30 minutes, then bake at 375 for 15-20 minutes right before serving.
    • Turn the oven off and let the cornbread warm in it.
    • Reheat the chili on med-low when the game starts - it'll be ready at halftime.
    • Assemble your fruit and veggie tray (blueberries, grapes, orange slices, sliced bell pepper, celery, english cucumber, and baby carrots).
    • (Notice there are hardly any dishes to do today!)
    • Eat with your friends, instead of slaving away in the kitchen during the game!

You, of course, can prep everything the morning of the gathering; everything is very simple to assemble - the waiting is the hardest part. Whatever you prefer, this spread took very little effort to make, it was fairly inexpensive (I think the grocery bill was around $55), it all turned out great, and it fed 9 adults with about a week's worth of leftovers. Also, it helps if you only have to go to the store once...unlike me, who tends to forget at least one thing even with a list. To help you avoid my mistakes, you will find a grocery list of everything you'll need to make our Superbowl Feast right after the cornbread recipe!


Northern Cornbread
from America's Test Kitchen Menu Cookbook

Ingredients:

2 1/4 c. all-purpose flour
1 1/2 c. yellow cornmeal
2 1/2 tsp. baking powder
1/4 tsp. baking soda
1 tsp. salt
1 1/2 c. buttermilk
1 c. frozen corn kernels, thawed
6 T. packed light brown sugar
3 large eggs
12 T. unsalted butter, melted and cooled

Directions:

Adjust oven rack to middle position and heat oven to 400 degrees. Line 13 by 9-inch baking pan with aluminum foil sling and grease foil (I just used my stoneware pan without foil).

Whisk flour, cornmeal, baking powder, baking soda, and salt together in a medium bowl. Process buttermilk, corn, and brown sugar in a food processor until combined, about 5 seconds. Add the eggs and continue to process until well combined (some corn lumps will remain), about 5 seconds. Fold buttermilk mixture into flour mixture with a rubber spatula. Fold in melted butter until just incorporated (do not overmix).

Scrape batter into prepared pan and smooth top. Bake until golden brown and a toothpick inserted in the center comes out clean, 25 to 35 minutes, rotating pan halfway through baking. Let the cornbread cool in the pan for 10 minutes, then remove from the pan using the sling and let cool on a wire rack for 20 minutes. Serve warm or at room temperature.


The Superbowl Feast Players:
  • Produce
    • 3 large, ripe avocados
    • 1 lime
    • 1 red onion
    • 2 yellow onions
    • 1 red bell pepper
    • 4 roma tomatoes
    • 2 heads of garlic
    • 1 bunch fresh cilantro
    • 1 Jalapeno (optional)
    • 1 10 oz. baby spinach
    • 1 c. frozen corn
    • Desired produce for your fruit and veggie tray (see above for my choices)
  • Pantry
    • Salt
    • Pepper
    • Cayenne Pepper
    • Chili powder
    • Cumin
    • Vegetable oil
    • 1 pkg. powdered sugar
    • Vanilla extract
    • All-purpose flour (7 1/4 cups total)
    • Yellow cornmeal
    • Baking Powder
    • Baking Soda
    • Cream of tartar
    • White Sugar
    • Brown Sugar
  • Meat
    • 2 lbs. ground beef (85% lean to help with the moisture)
  • Dairy
    • 6 large eggs 
    • 16 oz. sour cream (you only need 8 oz., but you can use the extra for the chili)
    • 1 pkg. shredded Colby Jack cheese
    • 2 - 1 lb. pkgs. butter 
    • 1.5 c. whole milk
    • 1.5 c. buttermilk (or add vinegar/lemon juice to the quart of whole milk you just bought)
    • 2 - 8 oz. pkgs. cream cheese
    • 1/2 c. feta cheese
    • 1/2 c. parmesan cheese
    • 3/4 c. pepper jack cheese  
    • Cheddar cheese to serve with the chili
    • Ranch or other dip for the veggie tray
  • Canned Goods
    • 1 can refried Beans (or 2 cups dry pinto beans)
    • 1 can sliced black olives 
    • 1 (28 oz) can tomato puree
    • 1 (28 oz) can diced tomatoes
    • 2 (15.5 oz) cans red kidney beans
    • 2 (15 oz) cans artichoke hearts
    • 1 box Ghiradeli brownie mix
  • Snacks
    • French baguette (to serve with the spinach artichoke dip)
    • Tortilla chips
    • Skittles

Sunday, February 1, 2015

The Year of No-Fuss Cooking {Breakfast Sandwiches}


This post will wrap up the No-Fuss Cooking Series. Don't worry, I guarantee that there will be plenty more slow cooker freezer meals featured on the blog, as I tend to be all about simplicity. If you have been following the series, you may have noticed how many different meals are in the picture, and also noticed that I have not posted every recipe. The Peking Chicken, while easy, was not a favorite. I most likely will not make it again. However, if you want to test it out for yourself, you can visit this blog.  Also, here is the Monster Cookie recipe if you would like - they freeze wonderfully!

Now, on to the Breakfast Sandwiches! We have a pretty set morning routine here in our busy house. We both need a good, solid breakfast to get through our day. These breakfast sandwiches were a lifesaver on those mornings that we were moving slow, but needed more than a bowl of cereal! Mister got a Breakfast Sandwich Maker for Christmas that is even quicker than the frozen sandwiches, and probably a bit better! I have never been one for speciality appliances like this, but we have thoroughly enjoyed it! They even make a *double* sandwich maker if you want to cut even more time. 

But, really... our freezer breakfast sandwiches! The key about this recipe is making enough to feed an army at one time and then prep to eat individually. The hardest part about the recipe is cleaning out the muffin tin after baking the eggs (you'll see), but if you spray it with non-stick spray, you should be good!

Ingredients:

12 English muffins
1 dozen large eggs
12 slices canadian bacon
12 slices cheddar cheese (or cheese of choice)

Directions:

Preheat oven to 350 degrees. Spray muffin tin with non-stick spray, and crack one egg in each compartment. Season with salt and pepper. Bake for 15-20 minutes, or until desired doneness. 

While eggs are cooling, slice English muffins in half, and top one side with canadian bacon and cheese. Add the egg, then the other half of the muffin. Wrap each sandwich tightly in plastic wrap, then place in a freezer bag.

To cook: Microwave for about 3 minutes, or put in the toaster oven for 5 - 10 minutes. If you are proactive, put desired number of sandwiches in the fridge the night before - this cuts down baking time.

Saturday, January 31, 2015

The Year of No-Fuss Cooking {Pulled Pork}


You have probably noticed that chicken is our go-to meat for main dishes. However, I try to mix it up occasionally. Today's no-fuss meal is an American favorite:  Pulled Pork Sandwiches. This recipe is easy and takes minimal ingredients. For my non-cooking friends, it's pretty difficult to mess this one up. =) Enjoy!

Ingredients:

1 - 3-4 lb. pork shoulder roast
12 oz. root beer (I use Henry Weinhard's)
1 bottle bbq sauce (We generally go with Sweet Baby Ray's)
Salt and Pepper

Directions:

Put the pork and root beer in a freezer bag, or directly into the slow cooker. Cook on low for 6-8 hours. Remove pork from slow cooker and shred with forks. Mix the pork with bbq sauce. You can use the liquid from the slow cooker to get the pork to your desired consistency. Season with salt and pepper and serve on a bun with coleslaw.

Saturday, January 24, 2015

The Year of No-Fuss Cooking {Salsa Chicken}

No-Fussing Number 4! Are you enjoying this series so far? I really am grateful to the fellow bloggers over at Six Sisters' Stuff, Who Needs a Cape?, and others for compiling so many great recipes... thank you, Pinterest!

This week's recipe adapted from Six-Cents is simple, delicious, and versatile. Salsa Chicken can be served with rice, as a burrito, or alone. Our favorite is definitely wrapped in a flour tortilla with the works (cheese, sour cream, lettuce, avocado, cilantro)!

Ingredients:

3-4 boneless skinless chicken breasts
1 (15 oz) can black beans, drained and rinsed
1 (15 oz) can diced tomatoes
1 (4 oz) can diced green chiles
2 cups frozen corn
1 jar salsa
1 T. chili powder
1/4 tsp. garlic powder
1/4 tsp. onion powder
1/4 tsp. red pepper flakes
1/4 tsp. dried oregano
1/2 tsp. paprika
1 1/2 tsp. cumin
1 tsp. salt
1 tsp. pepper

Directions:

Throw all ingredients into a gallon size freezer bag and freeze until ready to use. To cook, empty contents of the bag into a slow cooker and cook on low for 6-8 hours. Transfer chicken to a cutting board and let cool for a minute. Shred chicken, return to slow cooker, and mix. Serve however your heart desires!


Sunday, January 18, 2015

The Year of No-Fuss Cooking {Beef Meatballs}


The third recipe in our No-Fuss Cooking series. It is well known that I love cooking, baking, and eating. I love it even more when it is efficient and versatile. The meatballs whip up quickly in the food processor, and can be utilized in a variety of recipes: spaghetti, with rice, on a sandwich, or as an appetizer. Just flash freeze them after shaping, before you put the in a freezer bag so that they are easier to cook desired quantities.

Meatballs from "Can I Freeze It?" by Susie Theodorou

Ingredients:
One 1 1/2" thick slice rustic bread, crust removed, torn into small pieces
1/3 c. milk
1 lb. ground beef chuck
1 small onion, finely choped
2 T. chopped parsley
3 T. finely grated Parmesan cheese
Salt and Pepper
1 large egg, lightly beaten
1 T. olive oil

Directions:

Place the bread and milk in a bowl and let sit for 10 minutes until the milk is soaked up.

Place the ground beef, onion, parsley, Parmesan, salt, and pepper to taste in a bowl. Mix well with hands. add the egg and oil, and continue to mix. Finally, add the bread mixture and combine. 

Form 20 meatballs from the mixture. 

Wednesday, January 14, 2015

Perfect Cookies


If you like your chocolate cookies thick, chewy, and delicious, this is the recipe for you! While these are not actually my go-to Chocolate Chip Cookie recipe (these are), America's Test Kitchen never fails to deliver. These belong in a bakery!

Ingredients:

  • 3 1/3 c. flour
    3/4 t. baking soda
    1/2 t. salt
    2 sticks (16 T) unsalted butter, melted and cooled
    1 1/4 c. brown sugar
    1/2 c. white sugar
    2 large eggs
    2 large egg yolks
    1 T. pure vanilla extract
    2 c. semi-sweet chocolate chips
  • Directions:
  • Adjust oven racks to the upper and lower 1/3 positions. Preheat the oven to 325 degrees and line 2 cookie sheets with parchment paper.


  • In the bowl of a stand mixer, combine butter and sugars. Mix on medium speed until fluffy, 1 to 2 minutes. With the mixer still going, add the eggs, egg yolks, and vanilla, and beat for another 30 seconds. 
  • Add in the flour, baking soda, and salt and mix on low speed until incorporated, about 1 minute. Add the chocolate chips and mix until evenly distributed.
  • Working with 1/4 cup of dough, form into balls and place on the prepared cookie sheets about 2 1/2 inches apart. Bake at 325 for 17-20 minutes. Let cool completely before serving. 
  • Makes 20 large cookies